
April 27, 2009
The Coffee Grounds Worm Garden

My daughter helps me to prep the coffee grounds before putting them on the garden.
At the beginning of the month, I wrote about the large quantity of worm food I received from a farmer friend, including a huge box of coffee grounds. I’ve been playing around with the grounds as a worm food in the weeks since then, but haven’t started any fun projects to write about here (you know me and “fun projects” – haha).
Just as a quick aside, I should mention that I have been REALLY impressed with the grounds thus far. They do require a bit of extra work to make them worm friendly, but once they’ve reached that point, the worms go wild for them. My dad and I added a large quantity to our big “winter worm bed” (sheesh – it’s about time for an update on that, eh?), then soaked them down. He checked on the situation recently and was raving about the fact that the material is absolutely loaded with worms now!
Anyway, when I was outside doing some ‘gardening’ with my daughter (I use the term loosely, since there typically isn’t a lot accomplished – but it DOES tend to be a lot more fun! haha) I thought it would be interesting to see what would happen if I added a large quantity of coffee grounds to the bed beside my big outdoor worm bin. This garden was one of my “garbage gardens” from last year so there are likely some worm cocoons and potentially even worms still there – not to mention the fact that it is right beside a pretty decent source of worms. The only real garden plant in that bed is a Clematis – since they enjoy acidic soil, I think this could work out quite nicely (there IS a monster Catnip plant that pops up each year as well, but I’m not too worried about providing ideal conditions for it).
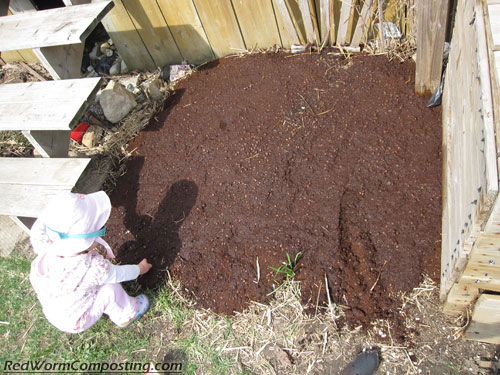
Since the grounds are quite dry, my daughter and I mixed in some water before adding them to the bed. We then watered the material some more using a watering can. Some rainy weather recently has also helped to soak down the grounds (which will be important to help kickstart the decomposition process). As it stands, there is a pretty thick layer on the bed right now, but I think I’m going to make it even thicker today. Coffee grounds actually make for a really nice looking mulch – and you can’t beat the smell! haha
It should be fun to see if I can get the bed crawling with Red Worms!
😎
The Chia Challenge

Early last year I tried to start a fun worm castings project with a ‘Chia Head’ (like a ‘Chia Pet’, but picture Homer Simpson’s head instead of an animal – haha). I never wrote about it here because it never really got off the ground. At the time I was battling a pretty serious fungus gnat invasion, and these little pests seemed to absolutely LOVE colonizing my Chia Homer – kinda taking the fun out of it!
My plan with the Chia Head project had been to see if Chia (Salvia hispanica) seeds would grow differently when briefly exposed to a solution containing a small quantity of worm castings (in that case, castings provided by Worm Power).
Well, even though the Chia Head itself had to be abandoned (I’ll try it again – I promise!), just for fun I ended up putting some of the seeds – some having been soaked in the water/castings solution, other just in water – in a grow dome on some wet cardboard pieces. As is often the case with my projects, the plants that sprouted ended up suffering from some serious neglect. The only thing I noticed initially was that the water treatment seeds actually germinated FASTER, so I really didn’t think anything was going to come of it. Little did I realize that for once, my neglect was going to lead to an interesting discovery!
Long story short – I basically forgot about the plants and they dried out. Oddly enough, those that had been exposed to the castings ended up being the only ones that didn’t die (when I re-hydrated the system, they quickly made a full recovery, while the water-only plants were definitely down for the count). I wrote a post about this – Worm Castings and Drought Resistance – and promised to redo the experiment to see if I could get the same results.
For some reason it popped into my head again recently, and I decided it might be a good opportunity to test out the vermicompost I harvested from one of my Worm Inns.
I must admit that serious science ended up thrown out the window with this second attempt – as you can see in the first picture (at top of blog post), I was a little sloppy with my seed distribution (among other things) between the two treatments (the no-castings treatment has a lot more seeds in it). This could have a serious effect on the results of course, since more roots will absorb water faster, thus causing this treatment to dry out faster. Duh!!
Anyway, I will definitely redo the experimental set-up fairly soon, but just for fun I will let it proceed as is for now.
Here is a run-down of my methodology…

I started by adding Chia seeds to two small containers of water

Next I added a small amount (perhaps a teaspoon) of vermicompost into one of the containers

I mixed up the water/castings solution, then left both treatments to sit overnight. The next day I gently rinsed the seeds (but as you can see, some of the vermicompost material stuck to the mucilaginous coating of the Chia seeds) and added some of them to moistened pieces of cardboard in a small humidity dome.

As was the case the first time I tried this, the seeds from no-castings treatment began germinating more quickly than those exposed to the castings solution.
The very first picture (at beginning of post) is one of the most recent taken. As you can see, the castings treatment seeds are doing just fine. The average leaf size seems to me to be a wee bit bigger than in the water treatment, and the green color seems to be somewhat darker. Other than that, there really doesn’t seem to be any major differences.
Anyway – that’s pretty much it for now! I will keep you posted on the growth of the seedlings. I won’t be adding any more water (other than what was added to moisten the cardboard) so they should start to dry out before too long.
Again, we’re NOT going to draw any serious conclusions from this yet. This is just the warm up round! haha
8)