
June 18, 2009
Texas Vermicomposting
Here is a question from Wayne:
I would like to start a worm composting bin. I want it
outside. I have a lot of scrap lumber laying around. My qestion is how
big? Also I live in Central Texas so is the heat going to be to much
for them. I would love to do it indoors but my wife is having none of
it including the garage. Any advice on size would greatly help. Thanks
Hi Wayne,
I’ve heard that the heat of summer can get pretty crazy in Texas (and other southern states), so site location will certainly be a very important consideration. For starters, I’d strongly suggest constructing the bin in a full-shade location – preferably as spot that still gets a decent breeze.
A wooden system is definitely a great idea since it will ‘breathe’ much better than something made out of plastic (I would never, ever recommend putting a plastic worm bin outside in Texas summer heat). As long as you keep the material nice and moist, the evaporative cooling should really help to lower the temps inside.
I would also make the system partially in-ground if possible – even if this simply meant digging a pit below. The subsurface soil should be a fair bit cooler than the ambient air temps. Perhaps partially embedding the bin into a north-facing hill (if you happen to have one of your property) would be another option.
Size of the system is an important consideration. I’d recommend a fairly large bin (perhaps a cubic yard or bigger) since this will help to prevent rapid temperature and moisture fluctuations. Of course, with larger size you will need to be a lot more cautious about what, and how much you add to the bin – particularly when you first set it up. You should definitely start with a really high carbon-to-nitrogen ratio habitat – lots of shredded cardboard, newsprint, peat most etc. Mix in some food materials as well, but definitely don’t fill the entire thing with manure for example, or you’ll end up with even more heating concerns. Bulky materials like the shredded cardboard will also help to increase airflow (and evaporative cooling) in the bin.
When all else fails, you might also try various artificial cooling techniques. One of the easiest methods is to simply rotate a bunch of frozen water bottles in the bin. If on the other hand you are looking for something a little more high-tech, perhaps Nathan’s ‘Counter Current Soil Cooler‘ on the Vermicomposters Forum would be up your alley.
8)
Hope this helps, Wayne!
**For Even More Worm Fun, Sign Up for the RWC E-mail List!**David’s Tub Harvesting Method
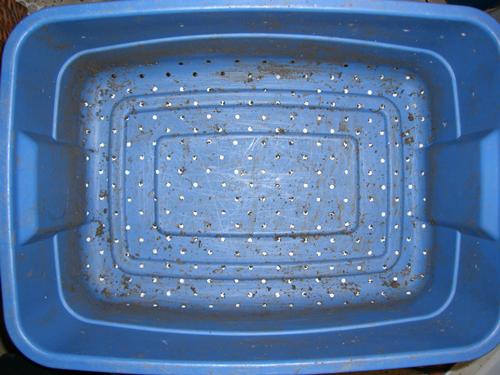
David Lozowsky’s tub harvester
Quite some time ago I made a video and wrote about my ‘Garbage Bag Harvesting Method‘ for separating worms from mature vermicompost. The idea behind this method was that it was a simple, inexpensive, and passive means of transferring worms to a new bin. Anyone who has gone down on all fours with a tarp and the contents of a mature worm bin to do the “light harvesting method” will know all too well that this is not the most enjoyable way to spend your time (speaking of which – I currently use a modified version of the light harvesting method that I will be writing about soon).
I received an email recently from good vermi-friend (and long-time reader of RWC) David Lozowsky, who shared with me his method for separating worms from vermicompost. His method is based on the same principles as the garbage bag method, but in my opinion is a much better approach. Rather than using a thin film of plastic, David simply uses an empty bin (of the exact same dimensions as his worm bins) with 1/4″ holes drilled in the bottom.
Interestingly enough, David uses the exact same bins as me – Rubbermaid Roughneck totes with the following dimensions: 24″x16″x8.75″ (LxWxH). This is as close to a ‘perfect’ DIY tub for vermicomposting as you can get (in my humble opinion) – it’s cheap, durable, holds a lot of worms/compost, and has a great surface-area-to-depth ratio.
Getting back to the topic of discussion…
Essentially, what David does is let a given worm bin mature over the period of time (hopefully he’ll chime in and let us know approx how long it takes before he harvests). As you can see in the pic below, the bin is full of vermicompost with very little (if anything) in the way of recognizable ‘food’. If you saw a close-up of the original photo, you’d see that it was also full of Red Worms.
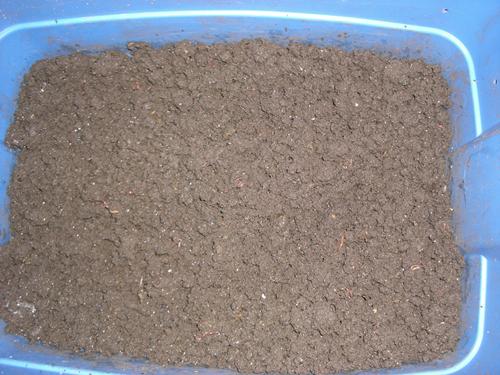
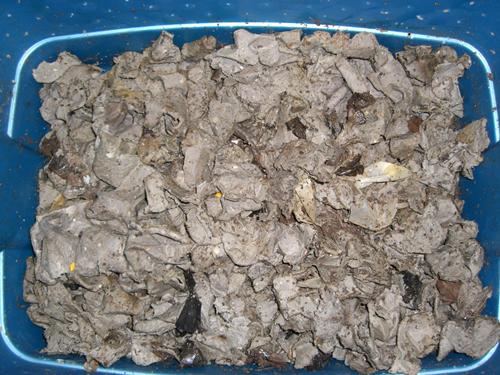
Once mature, a new system is prepared so that the worms have a tempting new habitat to migrate into (the photo below shows what the new system might look like). The tub harvester is then placed on top of the new system (sans lid, of course) and the contents of the mature bin are added. Next, two desk lamps are positioned over top of the harvesting tub to help encourage the worms to migrate downwards. After 12 hours or so, the material is mixed up to help the compost to dry out a little more and encourage any of the remaining stragglers to make the journey to the new bin.
According to David, this method has worked extremely well – I seem to recall him mentioning that only 5 or so adults were left after his last harvesting session.
Of course, people are going to naturally wonder about cocoons and hatchling worms – always the main issue when it comes to harvesting vermicompost. Like any other method, this approach will almost certainly result in plenty of cocoons and young worms being left behind. If this is a major concern I suggest letting the material sit for at least a few weeks in a new bin with some tempting food material (aged manure, water melon etc) sitting on top. Any worms left over should congregate in this area, and there should be some hatching of the cocoons as well. You won’t likely get every last one, but at least you’ll be able save a lot of little wigglers this way.
I personally don’t worry too much about this sort of thing. I have such an extensive system of trenches and compost ecosystem zones out in my yard that I feel secure in the knowledge that any left over worms will be able to find a safe haven without too much difficulty.
Anyway – that’s basically it. As you can see, this is a nice easy (and inexpensive) way to move your worms to a new bin, and end up with some fantastic compost in the process!
Thanks again David for allowing me to share this on the blog.
8)
All images courtesy of David Lozowsky, Brampton Ontario