

Back at the beginning of September I celebrated the 10th anniversary of using vermicomposting trenches, and mentioned an exciting new project I had recently started on a nearby country property.
Little did I realize that the project would basically become an all-consuming passion over the next few months. Probably helps to explain why there were so few blog posts during this time!
😯
The BIG goal was (and still is) to create a system that could produce an ongoing, large supply of vermicompost (ideally, starting in May 2019) for the property owner. This is why I wanted to get a jumpstart on things during the fall (rather than simply getting started next spring), and why I was a little “over-the-top” with my bed design. I’ll come back to that in a minute, but let’s start with a few stats about the project site:
Location: Waterloo Region, Ontario Canada – USDA plant-hardiness zone 5a
General Climate: Fairly moderate by Canadian standards – with winters that are less severe than a good chunk of the country. We have quite a bit of snow, and sub-freezing temps that last about 3-4 months. Summers can get hot, but extended periods over 30 C (86 F) are considered “heat waves”.
To provide some perspective here…
As far as winter vermicomposting goes – while I’ve had zero issues keeping populations of Red Worms alive over the winter (in low-lying, at least somewhat insulated beds), I have not yet been able to maintain what I consider to be a “fully active” outdoor vermicomposting system all the way through the winter (but have come close).
So I knew I would have my work cut out for me!
Which brings us back to the importance of bed design, not to mention site selection!
Based on the “ongoing, large supply of vermicompost” goal, I knew that the perfect choice for an outdoor location would be a “walking windrow” (as you can likely guess by now – haha). The basic idea, for those unfamiliar with the concept, is that you create a starter heap (or small windrow) – where the initial worm population is established. You then just start gradually adding newer (rich) materials to one side, extending the bed over time. The worms naturally follow in behind the “leading edge” (or “wedge” as it is sometimes called) where the best food supply is available, and eventually end up mostly separated from finished vermicompost at the starting end. In other words, it’s like a ‘low-tech’ continuous-flow system.
A decent sized walking windrow, with plenty of insulation materials over it would have a reasonable chance of staying active during our winter – especially with plenty of food/bedding resources available. But I wanted to give this bed as much of an “unfair advantage” as I possibly could!
This is why I decided to set the windrow down in a trench. I’ve found vermicomposting trenches to be such a great way to protect worms from temperature extremes, (and well, I’m just generally obsessed with them – lol) so it only made sense. But unlike my usual vermi-trenches, this one is my first “walking trench” – a trench that remains open at one end. This should help to provide a LOT more air flow than would typically be the case in a trench. To further help with this (and moisture control), I also decided to add a thick false bottom of wood chips – a resource that happens to be readily available on the property.
I must say that I really lucked out during the site-selection process. I was initially gung-ho about an old barn foundation, since it was well sheltered and had a concrete slab the bed could sit on (which has “pros” and “cons”). Thankfully, it turned out that the property owners were letting a local contractor use the site to store supplies – so it didn’t really make sense to try putting a worm bed there as well.
Just across the laneway I found what I still consider to be as close to a “perfect” spot as you can imagine. It was a heavily-overgrown gully sitting in front of where the original farmhouse once stood. It was up on a ridge yet very well sheltered on all sides.

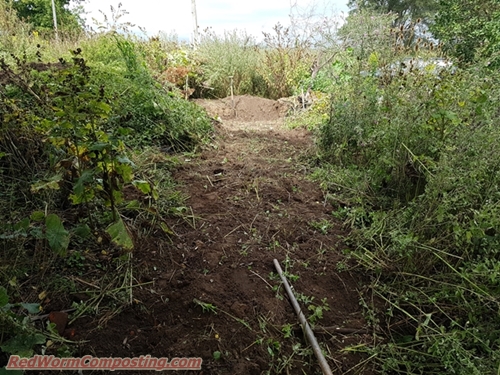
Step #1 naturally involved clearing out a swath of vegetation. Many of these weeds were way taller than I am! I decided to create a pit up at the north end where the initial worm habitat heap would be started. My rationale was that I would build up this zone a LOT and even heap up lots of snow (once available) so as to protect the active worm feeding zone (and leading edge) from cold northern winds during the winter.

There was already a raised ridge of soil around the north end of the gully, and excavating the pit only added to that – so I didn’t end up needing to dig down all that deep. At the bottom of the pit I laid down some wood chips and aged manure with some wide sheets of corrugated cardboard added to create a sort of “floor”. Over top of that I put down my initial deposits of worm-rich, aged horse manure.
I didn’t have any cover bedding with me that first day, so I ended up having to get a bit creative. I spotted a dense growth of some sort of weedy vine (pretty sure a wild morning glory) growing nearby and harvested a mass of it to lay down over top of the worm zone.

I was quite busy during the month of September, so apart from the odd deposit of new material, and a little bit of work on the trench, the bed was mostly left to sit until part way through October (which was just fine, since it provided the worms with a good opportunity to establish a thriving population).

As the cool weather of fall started to settle in I really began to throw myself into the work of getting the bed ready for winter. Apart from bulking up the habitat zone (we’ll come back to in a minute), I created a pretty serious trench (not very easy considering how rocky the soil was), and added my wood chip false bottom and cardboard floor.


Once I felt the habitat zone was bulked up enough (for the time being), I also got started with the leading edge – building it up with aged horse manure and various mixes of rich food materials.


I will admit to feeling very “lucky” about the ample material resources I’ve had access to – which is not to say that it has all just been handed to me on a silver platter, though! Resource gathering (and management) was a very important part of the project during the first few months.
Some immediately-local resources I gathered (apart from wood chips) included meadow grass, fallen apples, weeds and fall leaves. Off site, I also collected a lot of pumpkins and some bags of fall leaves during some curbside prowling missions, along with comfrey/plant debris from my own yard.


Manure has obviously been another very important resource for this project! My initial supply came from a boarding stable literally just around the corner from the country property (a coincidence that was almost eery, to be honest) – but I ended up caught (somewhat) off-guard in October when I discovered that they had taken away their entire supply and spread it on the fields.
Thankfully, I had been stockpiling it at the project site before that happened – and then ended up connecting with an even better local source. Someone who was literally more than happy to drop off loads of the stuff right at the project site!

I’ll admit that the arrangement quickly escalated into almost “too much of a good thing” – hahaha – but the good news is that I am now totally “set” as far as winter manure supply goes. The image below is misleading (doesn’t look very big), but I now have a massive heap of manure mixed with loads of wood chips sitting very close to the bed site.

I also put plenty of the manure to good use in the bed itself and in various other resource heaps. The big heap in the image below, that looks like an innocent heap of fall leaves, is actually a long-term food resource heap that contains (aside from plenty of leaves) wood chips, manure, cardboard, and LOTS of pumpkins!

One of the days I was working on the food heap I was even inspired to create a “Compost Guy Christmas Tree”!
😉

And yes, well…me being me, some goofball antics in general were inevitable!


The system has had some early test runs during wintry conditions. November 22, in particular, was incredibly cold – with a windchill temperature of – 21 C (- 5.8 F) – but everything (including the manure and food heap) has been staying nice and warm so far!


I am fairly optimistic that I will be able to keep the bed quite active all winter long – especially if we do end up with a lot of snow.
If my most recent trip to the project site is any indication, it looks like my main battle may end up being with wildlife. After several months with no real sign of critter activity in the bed, it looks like shrews have taken up residence. They are voracious worm-eaters, so this could make things interesting!
Definitely have some ideas (that don’t involve killing anything – lol)- but we shall see!!

Thankfully, from the very start of the project I knew that it needed to be documended very thoroughly, so I took loads of pictures, recorded videos – and wrote journal entries for each trip I made over to the bed site (and some other off-site activities that were related to the project).
I wasn’t really sure what I was going to do with it all. It was pretty obvious that it was too much to realistically share here. Plus, I also wanted to find a way to “fund” the work, helping to ensure that I’d be able to continue working on it for many months to come.
What has emerged from all this is “The Walking Windrow (Follow-Along) Project” – an online educational resource that allows people to follow my progress with the project, and learn about a wide range of related topics. [UPDATE: this is now part of the “Compost Guy Ultimate” membership package]
As exciting and inspired as the work was during the first few months (what I think of as “Phase I” of the project), my major motivation was always the idea of being able to share the work with a lot of other people. And I’m very excited that the time has finally arrived!
In an effort to get even more people involved, I’ve decided to offer some steep discounts early on (and there may even be some coupon codes floating around after the initial launch period is over, if you happen to read this well after the fact).
I hope you’ll consider supporting the work, and joining me (and the other members) on the inside! It should be a pretty interesting “vermicomposting adventure” during the months ahead!
Either way, my aim is to share more project updates (and related topics) here on the blog as well – so do stay tuned!
😎
**For Even More Worm Fun, Sign Up for the RWC E-mail List!**
Hey Bentley,
I am Darren from South Korea. I like your windrow and I would like to tell you about mine.
In my asparagus garden, which is raised, deep trenches between the beds have formed. They might be above knee height in depth, so I use them as trench windrows. I don’t have the luxury of manure, in fact, I can’t put any vegetables in them whatsoever because wild boars and the local badger family will dig them up along with my asparagus knolls.
Therefore, I use a lasagna-layer technique with mostly forest leaf litter, weeds, grass, cardboard, and large egg flats, but what is even better, which might interest you is that I throw a lot of rotten wood into the mix and I cover them with layers of rotten logs.
You see, my worms loved to be under these logs, and around rotten-wood debris is where I catch earthworms in abundance. I have Korean wild nightcrawlers, English red wriggles, and Korean blue worms living in them communally. Under these logs is where I find centimetres of worm castings, and sometimes it is over twenty centimetres deep.
I am also surprised at how quickly they eat. I get amazing results in less than six months. When I walk across my windrow/trench I can feel holes where the worms are eating more. When the weather is warm while walking across my trench windrow, if look back in my tracks, I can see plenty of worms arising from the leaf litter. The vibrations from my steps make them surface (ain’t they not so smart, but I am not a predator).
I should really send you some pictures, but does one man really want to show another man his bare windrow? (lol)
Sounds great, Darren!
😎
What are you doing about your shrew problem?
I currently have either shrews or mice living in my asparagus knolls. Oddly, upon relocating my asparagus crowns, I have noticed that my knolls are full of air pockets. I think these empty air chambers are probably good for my asparagus. (?) There aren’t any rodent burrows around these pockets either. Do you think the worms are creating them?
Anyway, my asparagus is growing extremely well this year.
Darren