

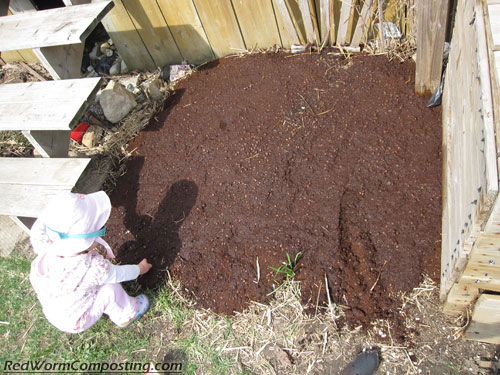
My daughter helps me to prep the coffee grounds before putting them on the garden.
At the beginning of the month, I wrote about the large quantity of worm food I received from a farmer friend, including a huge box of coffee grounds. I’ve been playing around with the grounds as a worm food in the weeks since then, but haven’t started any fun projects to write about here (you know me and “fun projects” – haha).
Just as a quick aside, I should mention that I have been REALLY impressed with the grounds thus far. They do require a bit of extra work to make them worm friendly, but once they’ve reached that point, the worms go wild for them. My dad and I added a large quantity to our big “winter worm bed” (sheesh – it’s about time for an update on that, eh?), then soaked them down. He checked on the situation recently and was raving about the fact that the material is absolutely loaded with worms now!
Anyway, when I was outside doing some ‘gardening’ with my daughter (I use the term loosely, since there typically isn’t a lot accomplished – but it DOES tend to be a lot more fun! haha) I thought it would be interesting to see what would happen if I added a large quantity of coffee grounds to the bed beside my big outdoor worm bin. This garden was one of my “garbage gardens” from last year so there are likely some worm cocoons and potentially even worms still there – not to mention the fact that it is right beside a pretty decent source of worms. The only real garden plant in that bed is a Clematis – since they enjoy acidic soil, I think this could work out quite nicely (there IS a monster Catnip plant that pops up each year as well, but I’m not too worried about providing ideal conditions for it).
Since the grounds are quite dry, my daughter and I mixed in some water before adding them to the bed. We then watered the material some more using a watering can. Some rainy weather recently has also helped to soak down the grounds (which will be important to help kickstart the decomposition process). As it stands, there is a pretty thick layer on the bed right now, but I think I’m going to make it even thicker today. Coffee grounds actually make for a really nice looking mulch – and you can’t beat the smell! haha
It should be fun to see if I can get the bed crawling with Red Worms!
😎
Hi Bentley,
Can you explain more about the extra work required to make coffee grounds worm friendly? I have had an enclosed vermicompost bin for almost a year, and this spring I have added a compost trench to my vegetable garden. I have been adding coffee grounds to both of those systems.
Thanks
Mara
I second Mara’s request. I thought (outside of aging the spent grounds a bit with the rest of my compost) that they were safe to add straight into a wormy environment. I hope you’ll make that a topic of a future article (or point to a past one that I’ve overlooked).
Adding my request too… yikes .. I have added a bunch of fresh grounds to a pail of locally collected worms. I am attempting to start a “native” bin. They seem to be doing fine, but do tell what I should be doing to my coffee grounds before adding to the bin.
I’m interested too…for a year now I’ve been feeding coffee grounds to my indoor worms and I’ve also been tossing grounds directly on my lawn and flower beds. Everyone seems happy—-lawn, flowers, worms—-but I’d like to hear more stories from more wormers.
Hehe – Guess I should have mentioned that in the post itself!
I am miles behind in my comment replies, but I figured I had better respond to this thread before I stress out too many people.
😆
Really, it doesn`t take much at all – could be as simple as watering them down and letting them sit for a bit.
I find that grounds that come from my own coffee maker are ok the way they are, but the worms generally wait at least a couple of days before feeding on them. I should mention that I buy `medium`grind – I find that the finely ground stuff isn`t appreciated as much (or at least it takes longer).
The specialty grounds may also cause some issues since they can contain other things – flavorings etc.
I suspect that if you are adding grounds to an outdoor system, there is really nothing you need to worry about (assuming you aren`t adding bucketfuls to a small system). For a small indoor bin maybe just make sure you have moistened the grounds, and try adding a small amount at first to see how the worms like it. You might also want to avoid mixing grounds in too much – add the material in pockets so the worms can choose to feed on it as they please.
Anyway, not sure if any of this rambling has helped, but I figured it was worth a shot!
8)
That is helpful.
Thanks Bentley.
so u us us coffee to star it
hi, i live in westfield massachusetts. I caught 200 nightcrawlers 3 months ago and love nightcrawling at night ever since i was a kid ,i used to sell them when i was a kid living in otis mass,did quit well at it.my interest has been resparked due to injury i have found much extra time on my hands and would like to try my hand at selling them again ,i can pick plenty after rain but would like to try and breed them and also start vermicomposting.Can they be bred efficiently enough so they can sustain worm numbers on there own? Also what size bin or home would i need to house say 1000,or so nightcrawlers and would this work for vermicomposting? thank you for your time.MARK
Hi Mark,
Unfortunately the “nightcrawlers” that come out of the soil at night are not good for vermicomposting. They need a lot more space and cooler temperatures. You might be able to grow decent numbers of them in large, raised garden beds sitting directly over soil. Just add lots of leaves, grass clippings etc and water frequently.
Hope this helps
8)
I agree with Bentley completely. And below is what I wrote last night but didn’t send…I can get long-winded on the subject of worms.
Hi Mark,
I’ll be interested in what other people say, but I’ve always read that the earthworms you find outside your home are not the same species as the redworms most people use for vermicomposting. Redworms like to live in garbage and feces, including their own. Earthworms we find outside, at least in the eastern US, would not thrive in bins like the ones most people use for redworms. These outdoor earthworms also eat leaves and other debris left by plants, and probably even manure, but they need more room, more places to burrow and make tunnels. On the other hand… if I were you I would give it a try. You might sacrifice a few worms in the process but let’s face it…I love my worms but in death they can go back into the earth to be eaten by other worms.
I used to “pick” wild night crawlers for use by fishermen. I would collect them in Los Alamos New Mexico schoolyard lawns at night when they came up to feed. I would collect hundreds and then package them in little tubs containing newspaper wads to be sold in bait shops.
They keep well in refrigerators and in shredded newsprint when moistened.
This is all to say they are very different from red worms.
I am beginning to keep a compost bed with red worms. My experience is nil and I’m on my early learning curve. Thanks for all the insights here. I came here wondering how to use daily coffee grounds to enrich compost and / or a worm bed.
I want to make everyone aware that red worms are not native to this continent, and it’s best to keep them in your indoor worm bins if possible. If they get into native forests here, they eat up too many leaves, so there isn’t a “normal” amount of leaf cover on the forest floor, which is bad for the native trees. This is true, also, of quite a few species of earth worms, which are currently a bigger problem than red worms, since red worms can’t tolerate winter temperatures, at least in the north. But they could, as Bentley hopes, possibly have their cocoons make it through the winter. So in the interest of trying to avoid disrupting native plant habitat, it’s best to keep red worms you’re raising for composting, indoors.
Hi Lucy,
Based on my communications with earthworm researchers, E. fetida definitely doesn’t seem to pose any threat (L. rubellus, absolutely! In some regions anyway). Apart from the likelihood that they will be killed in the winter (when in an unprotected natural environment), they MUCH prefer living in very rich organic deposits, such as manure heaps, compost piles etc. That’s not to say they can’t survive in leaf litter, or even potentially live in it for an extended period – I simply mean they won’t likely thrive in that environment the way other potentially-threatening species can.
Here is an article I posted on the topic last spring:
https://www.redwormcomposting.com/general-commentary/do-composting-worms-pose-a-threat-as-invasive-species/
Hi…I’m Brand new here!! I Live in Mesquite Nevada.I Have An AWESOME Earth worm Farm.It’s in one half of a 50 gallon Drum.I Put shredded paper,kitchen scraps,And Tea and coffee Grounds,My Farmer Friend Brings Me Poop Dirt Now and Then.There is No Drainage.I Put Nut shells and Pine Cones in there for Space.When the Pine Cones get full of worms,I Place them in spots in the Yard and Garden.Then when They empty out I put them Back again.I Take Care of 2 other yards out here and Our 3 Lawns and Trees and Gardens are some of the best looking in the Neighborhood.Chemical Free.I Also use the shredded paper in my gardens,and the grounds in the gardens and Lawn.Coffee grounds Keep Cats away From my Huge Tree Full of Nest.And Keeps the Worms in the Lawn Really Happy.Thanks for Letting Me Share.
Hi, first post for me. I received 1000 red wigglers yesterday and introduced them to my worm bin. The bin was derived from the videos I found here. I had started the bin at least two weeks ago. I used a lot of grounds from home and work. When I opened the bin the sides of the bin were wet and the top looked very moist. It was my lunch break so I dumped the worms in, gave them a drink and went back to work. 5 hours later I arrive back home to find my worms hated the bin. I knew from reading here that I had a problem with the content of my bin. I dove into my bin and started mixing it all around. I found that below the surface it was very dry…moldy but dry. The green mold on the grouds was like a dust. I spray bottled liberally, added some compost from my outdoor pile, sprayed more, and added an outer rim of shredded cardboard to deter the worms from climbing the sides (advice from here). This morning only 5 or 6 worms were on the wall…whew. Thanks for all the advice!
Hey, lucky worrm people, I really need your help.
I have found that Starbucks will give us all their coffee grounds. All you have to do is ask if you can have their coffee grounds. It’s best to wait until the morning rush is over, maybe about noon. I came home with about 50 pounds last week. I had heard and read that worms love coffee grounds. I also wanted to lower the PH from 7 to 6.5, which I understand is the optimum, so I purchased a bale of peat moss. I learned that it’s best to soak the peat moss for 48 hours and add coffee grounds to offset the real low PH of the peat.
So, I soaked peat and coffee grounds for 48 hours and gradually introduced the soupy, aromic mixture to my bins. This morning, maybe a week after the introduction of the peat/coffee to the bins, it seems God’s little men/girls have said “adios.” I don’t know if they dove to China or took off to go to the California beaches.
If anyone can offer advice to me, I would really appreciate it. We all try to be the best stewards we I can, but this one has me thrown for a big ol’ loop.
Help
JOE – coffee grounds can be a really tricky material to work with. I’ve been doing this stuff for 13 years now and I STILL have a love/hate relationship with this material.
What you described definitely sounds like a case of “too much of a good thing”. Grounds should definitely be added in moderation.
I can remember having a very similar experience myself when I first got into vermicomposting. Similar idea – I had heard how great coffee grounds were so I got a big bag from Starbucks and added a LOT of it to one of my worm bins. I didn’t kill all the worms but it wasn’t an ideal situation. Pretty sure I had to perform some sort of rescue operation.
A couple of other things to keep in mind. 1) Not all grounds are created equal – I’ve found coarse grind to be a lot better than fine grind. 2) For best results, the grounds should be aged or pre-composted with other materials for a while (just make sure they don’t dry out on you)
I have three bins of Red Wogglers, but all three bins are chuck full of Spring tails as well. Is there any way to get rid of the Spring Tails without harming the worms beside starting over and putting the worms in a pan of water to flush the Spring Tails.
I assume we are to only use a small amount of coffee grounds in the fonfined bins.
Thank you for this site being a new comer to Worm raising
Springtails are not a problem (they perfom a similar job as the worms) but if you are determined to get rid of them or at least reduce the numbers you might try watering and then putting other foods on the surface. Springtails tend to come to the surface in wet systems. You can remove the food items and rinse them off over and over again.
You might also try something like diatomaceous earth if they are congregating on the surface – but don’t combine with the watering method since water tends to decrease the effectiveness of DE.
Thank you I will try the rinse and replace method to reduce them
The water idea is working, but they are still alive hours later. Another interesting thing, the lid under the containers are full of thousands of dead Spring Tails. I do not know if they crawled out the vent holes fell there and died, or the worms or their cousins deposited their bodies down there, but there are thousands like sand, but the microscope shows them to be dead Spring Tails.
Hi Jim
Are you rinsing them down the drain with hot water? That should do it. As for dried up springtail carcasses, that is actually pretty normal in a bin with vent holes and a healthy population of these critters. Springtails are not adapted for life outside of a dark, high humidity environment like a worm bin, and will perish quite quickly (unless sitting in water, apparently – haha). They are not the smartest of organisms, so many of them just end up crawling out (perhaps it was a bit too wet in the bin for their liking etc).
I have witnessed something similar with mites – but in that case I’m quite sure it was in response to a seriously declining habitat in the system (it had become very acidic) – they were basically just trying to escape.