

Yesterday on the RWC Facebook Group wall Ria T. posted a question, basically wondering about her chances of success with some sort of sealed bucket system. Her hope was to completely avoid all possibility of dealing with fruit fly hassles.
As fellow group members explained, using a sealed system definitely isn’t the best way to go. The worms and other composting critters/microbes need oxygen in order to do their job properly.
My suggestion was to create some sort of breathable lid – using an old t-shirt (etc) or some sort of screen material secured with a large elastic band. This would allow enough air flow while still reducing the likelihood of fruit fly infestation.
As you can see, the discussion inspired me to test out the concept by setting up my very own “breathable bucket bin”!
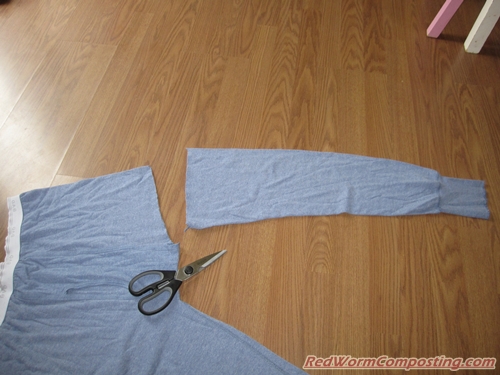
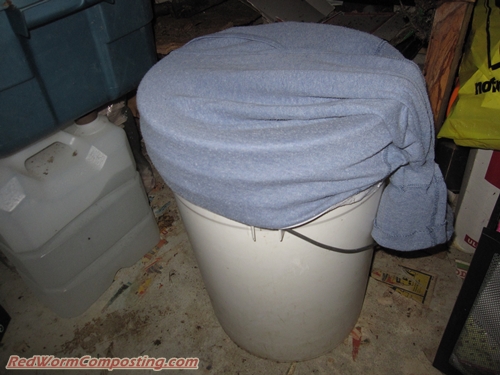
Thinking about putting a shirt etc over top of a bucket got me thinking about my “Creepy Pants” vermicomposter – and that made me wonder if having an arm or a leg tube involved would add some advantages.
Rather than having to remove the lid, you could simply feed through the tube, and even if you did end up with fruit flies or gnats, all you’d need to do was insert your vacuum tube and suck up the adults before feeding!
Luckily, I happened to find an old neglected pair of long johns at the bottom of a clothes drawer. Initially, I assumed I could use just a leg for the lid. I quickly realized, however, that it didn’t have enough stretch in it to do the job – so I did what, in hindsight, makes way more sense and used what was left of my long john’s! The elastic waist band worked perfectly to keep the material tight against the bucket, and there was easily enough slack to cover over the hole where the other leg used to be.
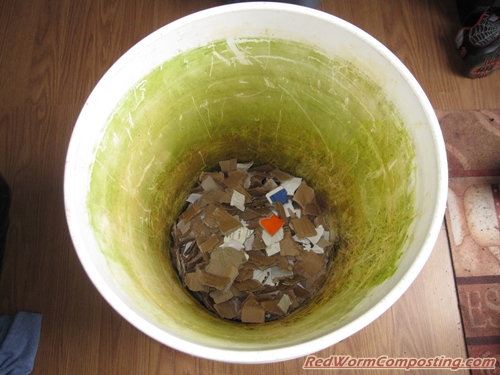
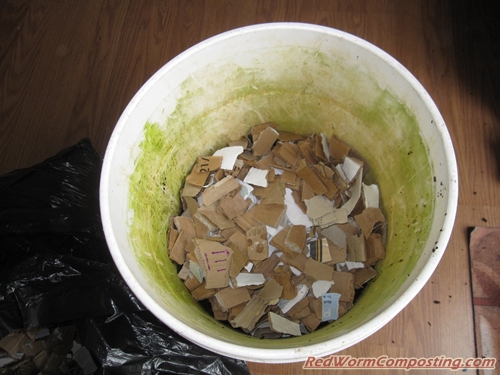
Setting up the bucket itself was pretty straight-forward. I started with a “false bottom” of dry shredded cardboard.
(In case you are wondering – the inner walls of the bucket are green from algal growth. This bucket was sitting outside with rain water in it for quite some time)
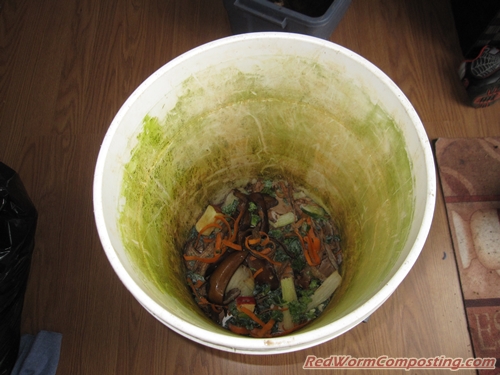
I then added a layer of food waste that had recently been removed from the freezer. This was covered by another thin layer of bedding.
It just so happened that I had a very small bin, containing mostly Euros, on the go in my basement. I figured I would simply transfer everything from it over to my bucket.
I think Euros could do very well in a bucket system, so that was definitely part of my rationale. There were relatively few worms in the small bin (likely fewer than 30 adults), so it should make for an interesting population growth experiment as well.
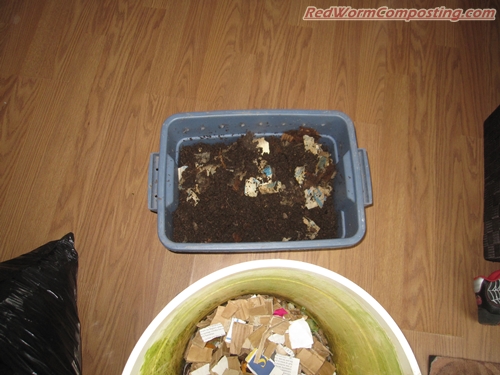

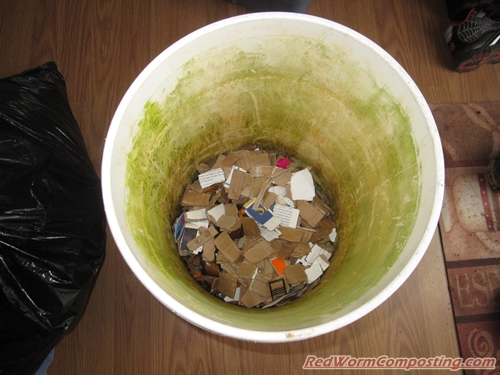
Once the wormy material was dumped in, I added one final layer of bedding before securing the long john over top. As an added precaution I sealed up the leg tube with an elastic band
I will likely leave the system to sit for a week or so before adding any more food. As touched on, there really aren’t very many worms in there, so the food already added should be more than enough for the time being.
Stay tuned!
😎
Hi Bentley,
Recently found your site and am in the process of deciding what I what to use for my first set up.
After reading your starting info I am leaning toward a worm inn set up since it seems the bins can end up with a soup mix in the bottom. Appreciate all the information you have here!
The breathable bucket is an interesting concept. Apologize for the newbie question, but when you mention a “false bottom” you mean adding the bedding on top of the bucket bottom not cutting out the bottom?
Thank you.
Hello
Rita might consider putting very inexpensive tulle over the bucket and simply tie it down near the top of the bucket with a long piece of string. Tulle is bridal veil material which is highly breathable. You can easily see through it and monitor conditions inside the bucket.
I purchase the material both at Jo Ann Fabric and Walmart.
I use the same material to cover garden broccoli, it prevents butterflies from laying eggs that turn into cabbage loopers and other nasty chewing green worms.
Gina W.
I am curious to see how this works for you.
Buckets just seem like a mess, and a pain. Its to narrow to do any tricks to get the casting out. You can’t feed on one side to make the worms move over. You just have to dump it all out and start fresh every time?!?!?!
I think if I would have started with a bucket I would have never kept doing it. And I am glad I have done it, because i have made several hundred dollars just selling extra worms.
I’ve used curtain sheers to construct a bag (think big pillow case) for a bucket bin. They’re inexpensive, UV resistant and won’t rot.
I found I had to twist the top of the back, fold it over and secure it with a rubber band to keep the gnats contained. Other wise they would find a way to crawl out of the bag.
Here’s a link to a forum post I did about a bucket crossed with a worm inn I made a few years ago. The main problem I had with it was drying out too fast.
I used an old shear curtain and some elastic to make a bonnet lid over the top and some sport nylon affixed to the bottom after I cut the bottom out of a bucket.
http://forums.gardenweb.com/forums/load/verm/msg121218437245.html
GINA – cool idea!
—
JOHN – I’m thinking of this more as a worm-rearing vessel. I agree, castings separation will definitely be a pain. Anyway – always fun to see what happens!
—
MR-YAN – that is hilarious (I meant that in the best possible way). It looks like a “Creepy Shorts” vermicomposter (which will only make sense if you are familiar with my “Creepy Pants Vermicomposter”).
Sorry Curtis – just found your comment now!
When I say “false bottom” I am usually referring to some sort of thick layer of bedding added at the bottom of a vermicomposting system (often a flow-through system – but obviously not in this case).
I use a lot of buckets they get crack most often around the top. Put a brick in one take another bucket drill a hole in the bottom put screen wire over the hole for a drain and drill smaller air holes above where it sits on the brick in first bucket. Now make your worm nest add worms feed as needed for about 60 days. I use this to start new bins out side for winter. tom
Hi Bently! I’d been meaning to try a similar type of thing for a while, since I discovered my attempted at a self-aerating compost pile using mesh bags actually brings the worms out of the ground.
But I recently started a new indoor bin, with a half-pound of worms, and made a nice cover for them! I think it’s some sort of polyester but it’s should work in letting the worms have air. Thanks for the idea!!