

I hadn’t planned to provide another vermiponics update quite so soon, but decided I should share a couple of recent changes.
Unfortunately, as can sometimes happen when things are shipped long distances (from one country to another in this case), damage can occur. When I first opened up my flood and drain system (back in April) I noticed a crack in one corner of the grow bed. It was fairly minor so I didn’t give it much thought (or bother to make mention of it). What I discovered however, is that the integrity of grow bed rim is VERY important in terms of supporting the grow bed over top of the reservoir. Once I started adding water to the bed I could see that the crack was getting bigger, and another crack even appeared in another corner.
Rather than risk having the bed fall down into the reservoir, I decided to make some wooden supports for it, so that no strain is put on the cracked rim. Hindsight is a funny thing, and now I find myself wondering why on earth I didn’t think of this before. Aside from eliminating stress on the grow bed, having it elevated like this is WAY better! When the pump is running, I now get a nice fall of water down into the reservoir which helps to keep things nicely oxygenated down there. Plus it is so much easier to add more water to the reservoir and just generally see how things are doing down there (with the pump etc).
You’ll likely notice that I still have not added the sheet of white plastic over the bed. As it turns out, I have decided that I won’t likely bother with this at all. The system is not heating up nearly as much as I had expected, and we are in the middle of a crazy heat wave at the moment. Rather than using the timer that came with the system, I’ve decided to simply keep the water running during the day and unplug it in the evening. This should definitely help to keep temperatures cooler in the bed as well.
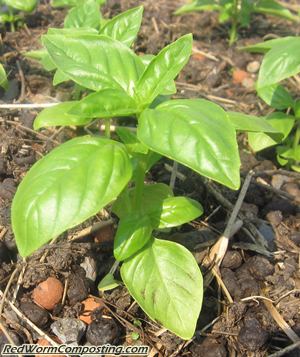
Since making the change, and allowing the pump to run for longer periods of time I’ve noticed a real change in the plants – they really seem to have perked up nicely (even the tomato). Should be interesting to see how things progress from here!
8)
Previous Outdoor Vermiponics Posts
Outdoor Vermiponics-04-26-10
Outdoor Vermiponics System
Outdoor Vermiponics-06-28-10
Bentley,i sometimes make things more complicated than they should be.But is it possible that someone in a hot climate would have to bury the tank in the ground? Do you know the water temps. you already have?
It’s hard to unlearn some things from years of doing it the old fashioned way.Like just sticking a plant in the ground.But it may be that we can learn a lot from trying this one.
I remember when i was a kid. At Disney,i saw what looked like a clothes dryer drum spinning around with plants with the roots inward,and were being sprayed with water mist.I couldn’t figure out why.Now i know it was anti-gravity testing.Doesn’t sound silly to me any more!
Hi Larry,
Burying the tank in the ground would probably be a great strategy. I can only imagine how hot a black reservoir would get sitting outside in your neck of the woods!
I just ran out and checked the temp in the reservoir and the reading was 28C (82.4F). It was somewhat warmer in the bed itself, but not as hot as you might expect for the contents of a black plastic container sitting out in hot sunny weather (we are expecting to get up to 90F today)
I like this setup Bentley. I can see the plants like where they are. I did some experimenting with basic hydroponics systems in the last year with decent results on a small scale. We enjoyed salad in the winter as I had a few one gallon ice cream buckets with an airstone going with two lettuce plants per bucket. I opened three holes in the top; one for the airline and two for yogurt cups riddled with holes and filled with gravel. I was amazed how fast they grew under shop lights with a cool/warm white mix.
What are you using as nutrient? Anything in addition to the nutrients shed by the worm/manure cocktail?