

Back in November I wrote about the set-up for a fleet of low-maintenance vermiculture bins (see “Set-It-And-Forget-It Vermicomposting“). It was just one of multiple sets of bins I set up last fall as a super simple way to move a lot of my worms indoors, keep them working away, while continuing to expand my “herd”!
When I called them “Set-It-And-Forget-It” I wasn’t kidding either! Other than a couple tweaks early on (come back to this in a minute), I did essentially forget about the bins until fairly recently.
What’s funny is this set of bins was actually one of the “younger” batches – only sitting for about 4 months! Some of the other sets have been sitting for more than 5 months (and counting).
Last week I decided to dump out a couple of bins and record what I found – here is the video.
Quick & Dirty Summary
– Lots of very tiny worms
– Major drop in level of material (no surprise there)
– Very little of the original (paper/cardboard-based) bedding
– Nice, humus-rich compost
Coming back to the “tweaks”…
As some of you may recall, the original plan was to completely leave the bins alone down in my dad’s (very cool) basement. After giving it some more thought, I decided it made more sense to “optimize” the process a wee bit more. I ended up adding a small amount of leftover Halloween pumpkin to each bin, and also moved them up to the – mostly empty, and much warmer – main floor where I keep a lot of my other bins. Apart from that – and a very occasional peek inside some of them – the bins were left completely alone.
—
All of this may seem a bit strange or pointless for those of you who are interested in much more actively vermicomposting your kitchen scraps etc – but I can assure you there is definitely some method to this madness. The overall concept is very similar to my “Insurance Bin” idea – a great way for outdoor vermicomposters to make sure they have some back-up populations of composting worms when conditions get extreme (hot/cold) outside during certain parts of the year. It is also a great way to produce individual vermicomposting starter cultures (a form of “Worm Mix“). The contents of each small bin would be perfect for starting up a more typical sized home worm bin (don’t believe the hype about needing “a pound of worms” – just not true).
And in fact – just for fun, that’s exactly what I’ve decided to do!
I am starting a bigger bin, though, so I decided to use the contents of both systems shown in the video.
The set-up process was very straightforward. Step #1 was to add a basic “false bottom” of coarsely shredded cardboard, with a light sprinkle of dry poultry feed. Normally I would proceed with the rest of the set-up, but in this case I added some water, placed a large plastic bag over top and left it to sit overnight (first image is how it looked the next day).

For starter food I added some frozen-then-partially-thawed food scraps.

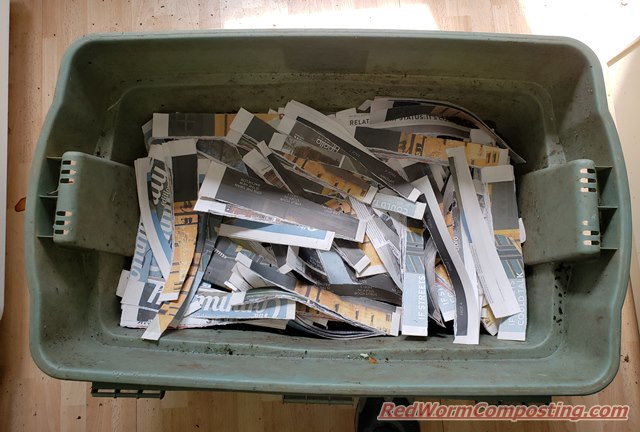
Next it was a layer of shredded newsprint, to provide a bit of separation between the worm zone and the food zone.

Then I simply dumped in the contents from both bins – making sure to carefully scrape out the bottom of each one (where there were loads of worms). The rationale here was that the worms could just hang out in their own zone until the food zone seems more appealing to them. I also wanted to provide a sort of “shield” over top of food zone to make it less likely that flying pests will be drawn to (and potentially gain access to) the new food source. Some of the other systems at my dad’s place have had ongoing fly/gnat issues – so it might be inevitable that this system ends up invaded eventually – but it’s worth a try right?
NOTE: One of the great things about the set-it-forget-it method is that, apart from maybe early on, these systems are NOT very attractive to flies. Neither “low-nutrition”, nor “long-term” are part of the fly/gnat gameplan! But…naturally, once you start adding a lot of food materials again, flies can be drawn in if they happen to be in the area.

Lastly, I added a cover layer of shredded newsprint and the same plastic bag I used while moistening the cardboard. I’m opting for the bag instead of using the actual lid since it will improve air flow, while still helping to keep a lot of moisture in.

As alluded to, I’m not overly optimistic that this bin will remain fly/gnat-free – but it’s not really a concern. The big goal here is to see how easily I’m able to get a thriving system going with two set-it-and-forget-it cultures.
Should be interesting. Stay tuned!
😎
Hi Bentley, I’ve set up a few of these boxes before, and am considering options for the future. I have some EB Stone Citrus and fruit tree food, which contains Blood Meal, Dried Chicken Manure, Bat Guano, Alfalfa Meal, Kelp Meal, Potassium Sulfate, Humic Acid, and soil microbes including mychorrhizal fungi. Its certainly NOT chick starter, and is much more expensive than chick starter. I’m curious your thoughts on using it as a food material for starting one of these bins.
Bently, I’ve had this tab open for several weeks and read the post a few times. You got me on this one, and I really need to do insurance bins going forward. I ran a bin in a garage over the summer and think I dried out the bin too much and over heated the herd.
But buying 15 heavy duty file box size totes seems cost prohibitive. I am thinking about using something like a series of sand bags. 25 ish bags would provide enough that each gets only “fed” once every 3 or 4 weeks.
I’ve sewn a few nylon zipper bags to mimic the worm-inn. And crossed one of them with the top of a 5 gallon bucket but always ran into problems where the bin would dry out in my basement. Something like a blue tarp or the woven plastic of a sandbag should get me around this.
Thanks
Matt- looks like I missed one of your comments. Sorry about that. Lots of different amendments that can certainly be used to boost vermicomposting systems. I would never recommend buying them specifically for this but if you happen to have any of them already, yeah adding some could be a great idea. Just be a bit careful about amounts.
—-
Mr Yan – I didn’t mean to imply that you need to start up 15 of these things. That’s just what I did because I had the bins and the wormy material (and other resources). One or two insurance bins is great. Sand bags is an interesting idea. Likely a bit messy but they could work if you keep on top of moisture levels (likely dry out easily).