
Earlier this week, I was reminded of the fact that just because I have 20 years of vermicomposting experience under my belt it doesn’t mean it’s always going to be smooth sailing.
I had high hopes for my “10 Worm Population Grow Challenge” – but alas, it went south in a hurry. I guess if there is a positive – apart from some important lessons I’ll share a bit later – it’s that it was a “fail fast” scenario, giving me the opportunity to potentially get a new project going without losing too much time.
So, what happened?!
Right off the bat, let me justify the (poor) results a little bit by saying that I was indeed expecting some hiccups. Some of you may recall that I was planning to check on the systems quite early on so that I could replace any worms that died off fairly quickly.
The fact is, as “nice looking” as these breeder worms were (you know you are a “worm-head” when…lol), they came from another small-system experiment that hadn’t exactly been a monumental success either. Sure, it could be argued that the survivors of that project had proven themselves as “tougher” worms (and that idea did indeed help me to justify using them in the 10-worm experiment)…but looking at it another way, maybe they just barely survived – and it didn’t take much to push them over the edge this time around.
Anyway – the long and the short of it is that when I finally got around to checking on the systems earlier this week (sometime around “Day 14 or 15), it was clear that I ended up with plenty more dead worms than the “maybe one or two” per bin I had predicted!
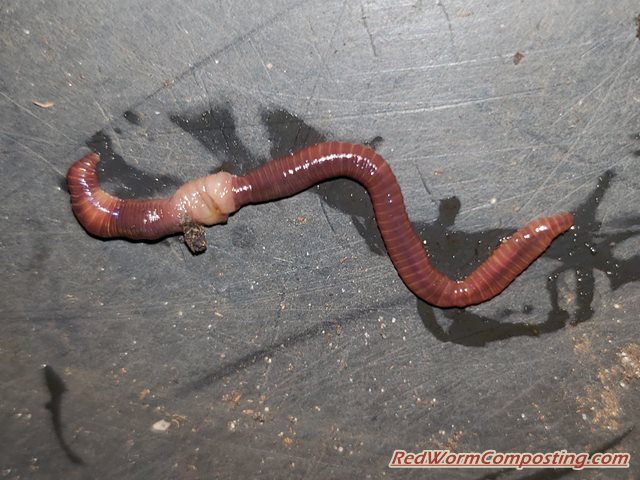
At first it looked like it was going to be a “not good, but still salvageable” situation. I managed to find 5 of the original 10 worms in the first little tub I dumped out, along with some cocoons. One of the 5 worms was clearly in trouble, though, so I decided to remove it.
Here is an image of said worm (maybe “sad worm” is more appropriate – haha). The color looked quite good, but the distorted clitellum and almost “bumpy” appearance of the body (should be smooth and firm) made it clear this wiggler wouldn’t survive for much longer.
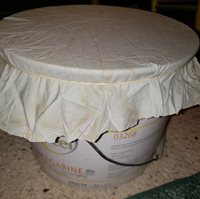
I decided to replace the missing worms in this first tub with 6 taken from my original “breathable bucket” system – we’ll come back to the rationale behind this a bit further along.
Unfortunately (or fortunately, depending on how you look at it lol) things just basically went downhill from there – at least for the smaller systems. In the next little tub I found ONE worm that seemed somewhat healthy, along with a number of others in the dead-or-dying category. In the third small tub I couldn’t find a single survivor.
I wasn’t too surprised to find more worms (7 in total – and I may have even missed one or two) in the bucket system. Having more space to spread out in (and likely better air flow) can really help worms avoid hazardous conditions. Even one or two worms dying in a small tub would likely create pretty toxic conditions for the other worms (ammonia etc release).
—–
In spite of the better results in the bucket, there wasn’t much point in trying to continue on with the experiment as-is. At first I toyed with the idea of simply using the bucket system as my “population” to monitor – but ended up deciding that a fresh start would make a lot more sense. Not 100% sure when I might get something going again – but hopefully in the next week or two!
Now back to the “important lessons”/reminders learned from this experience…
1) The age of your starter worms and the system they came from can have a major influence on your chances of success. These older/bigger breeders originally came (primarily) from my vermicomposting planter system. Even in the middle (composting) compartment the habitat was more like a rich soil than an active worm bin.
It is widely known (has even been reported in scientific literature) that young worms and cocoons are better able to adapt to a new environment than older worms. I think it’s safe to say the environment in my first set of tin tubs (experiment before starting 10 worm project) was quite a bit different than the planter habitat the worms came from!
Which also brings us to…
2) Don’t use worms that have been potential weakened in another experiment (or at least demonstrated a tendency to die off). This is likely one of those “Duh!” situations – maybe hindsight 20/20 if I’m lucky – but it was just silly to use the same worms that clearly didn’t do all that great in the first little project.
What’s “funny” is that my initial gut feeling was that I should actually be using smaller worms from active indoor bins – and I even started collecting some from my first breathable bucket system…but those other “breeders” just looked so perfect and were easier to round up, so I tossed common sense out the window.
3) Be VERY careful with grass clippings! As you may recall, the habitat mix I made up for the 10 worm experiment was mostly a mix of mulched fall leaves and grass clippings. I have no idea if this played a role at all – it had already been sitting for a little while, and the proportion of clippings was quite low…but with little tiny systems this definitely can’t be ruled out!
———-
Just generally, this has been an important reminder that there are always going to be “hiccups” with vermicomposting – regardless of your level of experience. The key is just to dust yourself off, learn from any mistakes that were made and just get back at it!
The rewards (in the long run) of this quirky activity greatly surpass the hassles!
Stay tuned – more to come with my population growth experimentation!
😎
 Update)
Looks like pearling from anaerobic conditions – did the habitat smell a bit funky? Did they have anywhere to escape to? Leaves are pretty full of lignin depending on species and harder to break down liquid amber breaks down better than waxy leaves for example. They can also mat with the grass and start fermenting.
Or protein poisoning from the grass as the leaves draw out the nitrogen from the greens