

Last week I dedicated a lot of time to the Hay Bale Vermigardening project (which helps to explain was the blog was so quiet). As is usually the case, I really underestimated the amount of work these beds were going to require! My recommendation for most of you reading – especially if you are just getting started with vermigardening and/or if you have any sort of physical/health limitations – would be to start with something MUCH smaller.
That being said, I’m happy I decided to go all out since things are only going to get more interesting from here!
😎
Rather than jumping back and forth between work on each of the two beds (as I did initially), I decided to start with the (smaller) railway tie bed, and to see it through to “completion” (phase I) before getting back to the larger bed.
Here is how it was looking when I posted my last update:

The first thing I did this week was to dig it a bit deeper.
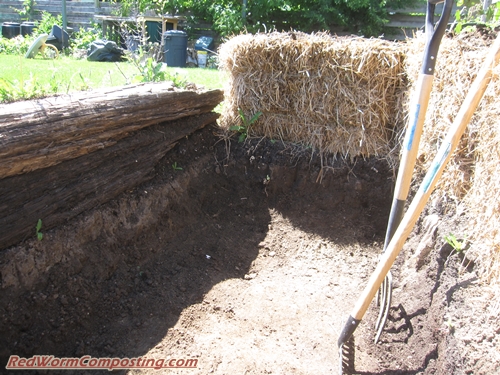
Which brings us back to the topic of “the amount of work required” – lol.
I gotta tell ya – it’s amazing how long it can take to excavate (by hand) heavy clay soil with quite a few rocks in it! I like to think I’m pretty fit and strong (for someone 41 years young), but it felt like I was spending hours just to earn a few more inches of depth! It probably didn’t help that it was quite warm/humid and sunny when I was doing the work.

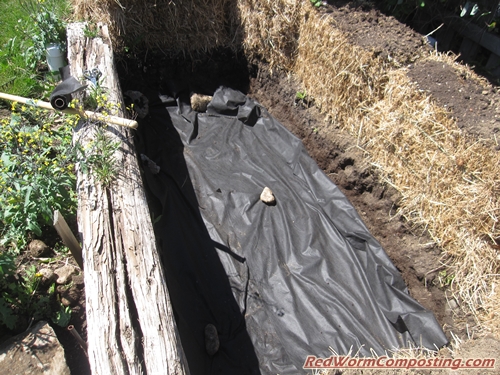
Once I’d reached my “GOOD ENOUGH (@#!!!)” threshold, it was time to lay down some landscape fabric. Just my luck, it was super windy that day so I had to use some of those excavated rocks to keep it weighed down (removed once I started filling the bed with material). The fabric is thinner than I expected, so I’m not really optimistic it will make much of a difference – but I figure it may help to retain a bit more water.
Next, I dumped in a big ol’ heap of wet cardboard! Just as I tend to underestimate the amount of work a new worm bed is going to require, I also tend to underestimate how much stuff these beds can take!! I felt like I had stockpiled a massive quantity of cardboard (assuming it could be used for both beds), but I used up my first batch in short order!

I then excavated some worm-rich material from an outdoor trench and spread it over top of the cardboard.

Followed by another wet cardboard layer (my wife’s co-workers collect coffee trays for me)…

…another worm-rich layer…

…a layer of comfrey…
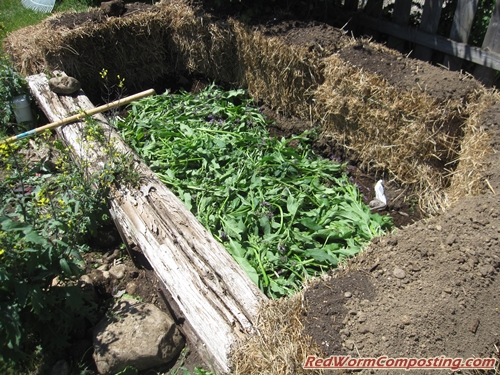
…and lastly, a very thick layer of loose hay.

At this point, the overall level of material was probably close to “ground level” – so definitely plenty more volume to be added. Apart from not having enough material on hand to fill the bed all the way, I also wanted to avoid having the bed turn into a serious hot composting pile.
Since then, the bed has served as a very handy spot to toss heaps of weeds I’ve been pulling from my gardens (ultimately will serve as a valuable worm food, and nutrient source for bale garden plants). I have also tossed in a couple bags of frozen-then-thawed food waste.
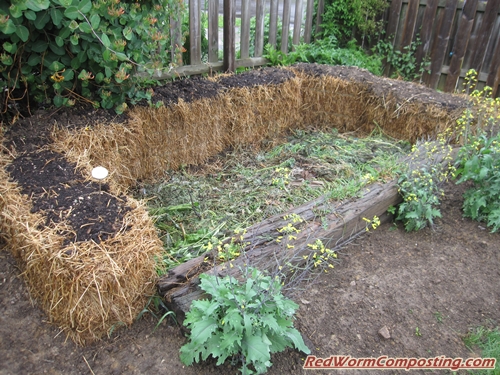
So far everything seems to be coming along beautifully! In coming weeks I’ll be gradually adding more organic matter and more worm rich material.
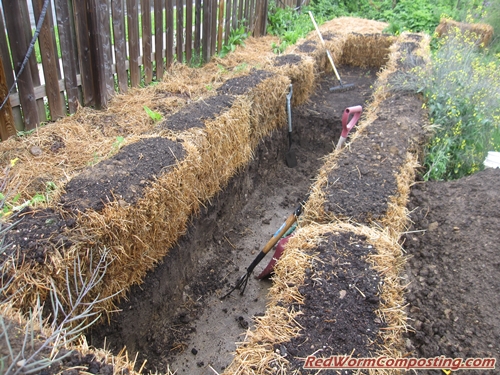
OK – moving on to the larger bed…
This is how it looked when I posted my last update:

The first thing I needed to do was get all my bales in place.

Then, once again, it was back to manual excavation mode (imagining what it would be like to have a rototiller…or a backhoe). I think that first little stretch of bed was probably the worst. Part of me kept saying “deep enough”, while my adventurous side kept nagging me to keep at it. Overall, I figured if I’m going to do this I might as well go all out.

So I basically ended up with the start of a pretty serious vermicomposting trench. What’s cool is that once I had my level established, and enough lower floor for me to stand on, it became much easier (physically and mentally) to just keep cutting away at the upper layer and pitching loose soil out of the trench.
But it was still a LOT of work!

With a very serious rainfall forecasted for yesterday evening, I really wanted to see if I could get it finished and loaded up with material yesterday afternoon. But alas, it wasn’t even close to “in the cards” for me based on everything else happening on the home front!
The good news is that I am about 2/3 of the way finished now. I also discovered some other nice stashes of cardboard I’d forgotten about, and all of it got a thorough soaking during the downpour last night and this morning. So I should be in good shape for “finishing” (again, phase I) the bed this week for sure.

As for the actual “gardening” component of this project – I think I am very close to being able to start planting in the bales. They seemed to go through an initial, fairly short-lived, heating stage with temps getting up to 55 c (131 F) – but they are now down around 30 C (86 F). We’ve been lucky enough to have two very serious rainy periods since I last wrote, so I think they’ll be in great shape by the end of this week.
Stay tuned!
😎
What did you do with all the excavated dirt? Is the excavated area just for the worms or does it get planted into as well?
Wow that’s very huge project. Just wondering why you need that landscape fabric at all? Is not it for suppressing weeds? Thanks
Is there an estimate for calculating how many worms to use for the area of the garden trench? I live in northern Ohio and am wondering if the worms can be over-wintered with temps dropping below negative 10 degrees for short periods of time. I would like to build a 20 foot long trench.
Jean – forgot to reply to you here! Sorry about that! I spread the dirt all around the beds and various other places in my yard. I wrote about it in my next update:
https://www.redwormcomposting.com/gardening/hay-bale-vermigardening-7-1-15/
—–
Ruby – I think the fabric will help retain moisture, but yeah I honestly don’t know that it’s worth the extra effort/expense. What would have been better is actual thick felt. But of course that would have cost a lot more.
—–
Gardenboy – honestly, I never think in terms of “how many worms per unit area?”. Since it’s an ongoing project I am more than happy to just let the worm population develop on its own. The absolute MOST important thing is to create a worm-friendly habitat. The worms will take care of the rest (and breed like crazy). Any low lying, semi protected outdoor bed will probably be fine for overwintering. A trench like the one I’ve created is overkill for sure (and I am more northerly than you here in Southern Ontario). Trenches are fantastic overwintering beds.