

Hi Everyone – I wanted to add a quick follow-up to yesterday’s Worm Factory post (see “Worm Factory 360 Set-Up“). There were some important things I forgot to mention.
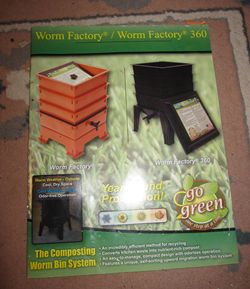
Some of you may have wondered about the coir and pumice that comes with the Worm Factory 360 start-up kit. While I had always intended not to use them right off the bat – I DID at least want to make mention of them. These are an important part of the set-up process when you follow the directions outlined in the manual.
Speaking of the manual – I also wanted to make mention of the fact that – while I myself am not a manual-sorta-guy (nearly 12 years of vermicomposting makes me a bit more set in my ways – haha) – I AM very impressed with the quality of information contained in this booklet! If you are new to vermicomposting I highly recommend you follow the directions outlined. Unlike some other instructions I’ve seen for setting up a new system, these ones seem to cover a lot of the areas I myself feel are important: 1) proper food prep, 2) lots of bedding, 3) “living materials” etc. There is also a fair amount of good maintenance/troubleshooting info and general vermicomposting info.
Anyway, in light of the fact that I was planning to write this follow-up, I decided to go ahead and put some of the coir and pumice to good use today (rather than waiting for a little while). I know I came across the information on what exactly the pumice is for – pretty sure it is a bulking agent and odor absorbing material – but I just can’t track it down now.

I must say I was REALLY impressed with the coir brick. I dropped it in some water and was astounded to see a big fluffy mass of coir springing forth right before my eyes! I’m definitely used to waiting for awhile for a brick to expand (likely part of the reason I didn’t want to bother with it when first setting up). Pretty cool!

I also wanted to mention that I added some more food waste. There was a semi-rotten hunk of cauliflower lurking in the bottom of one of my crisper drawers (lol) so I nabbed it and chopped it up into small pieces. This reminds me – yesterday someone expressed surprise regarding the size of the pumpkin chunks I was adding to the bin. What I failed to mention was that – aside from these pieces being quite soft – when I mixed them with the bedding materials they broke down a fair bit more. I do have some chunky stuff still – but certainly not anything to worry about. Cutting up materials (and otherwise breaking them down) as much as possible before adding them IS a really great strategy though – so please keep that in mind.

I also decided to add some of the nice rock dust I received this past summer since it should help to stimulate some more microbial activity, add trace elements and provide the worms with some grit (for their gizzard – to aid digestion). In the WF-360 manual they mention “crushed egg shells and/or sand” – these (especially the egg shells) can be helpful as well. Also, please keep in mind that NONE of these amendments are vitally important for worm bin success – a simple food-waste-with-bedding system can do just fine as long as you follow the basic principles of effective vermicomposting.
Just so you know, I added about half of the coir and a small quantity of the pumice (likely pretty close to the 1 cup mentioned in the guide).

I then mixed everything in very well.
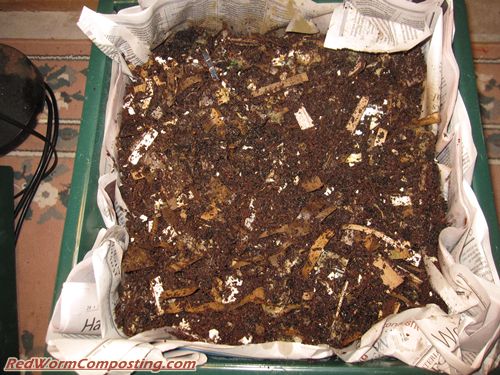
Before doing any of this, I had the chance to dig around in the bin a bit. I was happy to see that the worms were already munching on the pumpkin waste. I saw the odd fruit fly – will likely see a LOT more of them before too long (haha) – especially now, since the materials will probably warm up a bit.
One other quick thing to mention before I sign off here. I had wondered (in my first post) what the special aeration features were for the Worm Factory 360. Kate informed me that it’s primarily the way the lower tray sits on the base, and the way the lid sits on the upper tray. In both cases there ends up being an air space (I noticed this with the lid), so there is the potential for a nice flow of oxygen from the lower reaches up through the trays and out underneath the lid! The key of course is to make sure we don’t let materials in each tray get too wet and packed down! I’m sure we’ll talk more about this as I start to work my way upwards over time.
OK – that’s all for now. I’ll likely provide another update towards the end of next week!
8)
I am glad to hear I am not the only one with semi rotting fruit hiding in my crisper drawers either..lol
HAHA – I think us “worm-heads” tend to let things slide a bit in that department – more food for the worms, right?? lol
hardly anything goes to waste here..if the worms can’t eat it..the chickens do. I’m constantly yelling at my husband”don’t throw that away!!it’s still good enough for the chickens/worms”…lol
Looks good, as far as rotting food can, to a human. 🙂
My WF 360 project enters day 4. Using the info from worm suppliers suggesting that the worms will eat 1/2 there body weight a day. I started my bin with aprox 4 Lbs, aprox 4000 wigglers. So far so good, I guess. I monitor the tray temp it stays 65 to 70 deg F. Worms are active ,smell is pleasant. No worms tring to escape (Yet)
Question? There bas been no tea collected as yet. My concern is about the moisture content of the box. Should I water it down once in a while? The juicer pulp ,main supply of worm food ,is not soaking wet, but moist to the touch. I add mixed fruit pulp in AM,mixed Veg pulp in the PM. (No Citrus)
The wife wants to know if I have named the worm ,and my dogs seem as curious as me when looking into the box.
Come to think of it ,may need to fasten the lid down so the dog don’t help themselves to a midnight snack.
This is great stuff! I hope it turns out to be a success. I’m also glad to know that you thought their manual was worth the read. I just finished setting up my 74 Quart Ultra Sterilite bin this evening. More on that one later, but please let me know how much liquid you amass, and how with Winter approaching, you plan to put it to use!
🙂
RON – Wow! 4 lb of worms in a single WF-360 tray? That’s impressive!
The “tea” side of things is something where a lot of people end up confused – often assuming they are doing something wrong if nothing is accumulating. While this drainage liquid (leachate) can certainly be used as a sort of fertilizer tea, it’s definitely not the same thing that’s created in a vermicompost tea brewer etc – since that requires the use of finished vermicompost. By the time your lower tray is ready for harvesting, I’m sure you’d be getting some decent tea accumulating since lots of mature compost for the liquid to pass through, but certainly don’t worry too much about it now.
That being said, since the bin DOES have drainage and since the worms do tend to like it quite moist – you could probably get away with spraying it down more often. I’ll certainly write more about this in my upcoming posts – I still don’t have a good sense for how often I will need to add water.
—————–
RICH – I am hoping my reservoir liquid ends up being a nice source of parasitic nematodes, so I’ll likely be using it to re-moisten the tray(s) above. I may try it on some indoor plants as well once the system has been up and running for awhile!
Did a little digging this morning. I carefully raked down through the first tray of bio matter, coir, egg cartons ,newspaper ,pumice and worms to have a look see, things are looking good. The deepest part is already showing signs of deep dark rich looking goop ,which I’ll assume are the beginning collection of castings.
I notice some moisture collecting like dew in the collection tray and under the lid.
I also noted that the box temperature is 10 deg warmer @ 70 deg 100% humidity , than ambient temp of 60 deg. 80% humidity , no doubt promoting the condensate it the box.
Rick
Once I collect enough “Tea” I will incorporate it into my wheat grass crop , sprouting and house plant soil. I will also stock pile concentrate for use in spring fruit and veg planting.
Question ? I use food grade peroxide in my sprouting operation, it promotes growth and controls mold and mildew . I have seen literature stating that in minimal solution it is not harmful to worms . I am interested to know if it would be a benefit to worm composting?
What’s your take?
Bently, I have one of these bins (my DIY rubbermaid bin lives outdoors and this one is my basement bin for winter composting). I have found this bin to be awesome. Produces very fluffy compost.
BUT, I put a second tray on top of the working tray. It has a very thick layer of DRY shredded newspaper. This has kept my bin fruit fly free. I had a fruit fly problem until I did added the additional try on top – no worms are interested in coming up there. I also put either a folded paper bag OR a piece of fabric on the top of the working bin (and set the dry bin on top). no flies. happy me.
I have the worm bin 360 and it works well, but after about 6 months of use it seems that you only need 2 bins. I started a 2nd worm farm using the other two bins with a piece of wood to separate the farms. I took a hand full of worms from the active bin and started a new system. It works well and now I harvest compost from 2 bins. It seems that 4 bins for one farm is not necessary. So doubling the size of the worm farm seems like a good option and all 4 trays are in use. You do need more worms as they breed rapidly.
I have the worm bin 360. I have had it now for 4 months. I am surprised at how much better it is to use this than the rubbermaid tote I started with this past summer. I started out with 2 lbs. of worms and now have tons and tons of babies. I took all summer long and packed lawn clippings and garden waste ( mulched up with lawn mower for smaller pieces) into a 5 gal. buckets for feed for the worms thru winter. Along with kitchen waste left over dead halloween pumpkins, fall leaves. Going to have tons of worm compost for spring use and already have 4 gallons of tea from moister draining from the 360. Totally Satisfied with this.
I got one of these for my birthday in March, and so far it’s been working great! I found your site especially helpful for starting out – so I really appreciate all the effort you’ve put into your website!
In case you never did find out why the pumice was included, it’s to help with aeration – because it’s rock it won’t shmoosh down, and it helps keep the acidity levels in control.
Just started my worm factory yesterday and excited to report that they are active!!! I must have done something right!
I have had my Worm Bin 360 since October 7 of this year. I am happy to report that I am on the 3rd level, and see lots and lots of worm babies. I have my worm bin in the basement, and temperature ranges from 73-79 degrees Farenheit. I have bumped my feedings to 6 oz. green, and 6 oz. brown daily. I might have to increase it more, as the worms look really hungry. The babies really started showing up within the last two weeks.
I am happy with my Worm Bin 360!
What is the Pumice use for in the Worm Factory 360. I order just the basic worm factory that did not have the pumice. where can you order the pumice or can you make your own up. thanks.
I have somehow misplaced my instruction booklet! I have 3 levels right now and have been running the system for about 6 months. I used 2 containers (60 worms in all) big red worms from Walmart – they have really multiplied – lots of babies!
It seems I had read that in order to “finish” the castings you take the bottom bin and put it on top for a certain amount of time while putting the food in the tray below to attract the worms. Do I remember correctly??? PLEASE HELP!
thanks for all the wonderful info!!! I too do not have any tea yet but beds are nice and moist
http://www.naturesfootprint.com/community/articles/worm-factory-360-setup
Susie
You have it backward, You place a fresh bin on top… The worms migrate upward to the fresh bin and new bedding/scraps leaving the castings behind. There are YouTube videos as well … the link above gets you to the PDF for basic setup. The website also has FAQ
Good luck
Ps… You will need to harvest the castings from the bottom bin if you do not have afresh bin o your rotation will always be an upward migration.
Hey guys thanks for the advice. I just bought a used Worm Factory 360 tonight. The bottom tray came 1/2 filled with compost and worms and no visible food. Lucky for me, I have an already established worm farm made out of two DIY Rubbermaid bins that have been rotated recently. I moved the contents into the next tray up on the 360 and am looking forward to the worms in the first tray crawling up to the second. Never knew anything about rock dust or coil coir. My DIY bins was made up of well soaked shredded newspaper and cardboard, some dirt and leaves.My worms are very healthy with lots of babies. I expect the 360 to speed up the process with the wonderful tray design. The best part is I won’t have to dig through the rubbermaid container to havest the castings. It’s time to let the worms do the work.
Why is it there is no set way to start using the 360. I must have watched 7or8 videos and none are the same. None of them seem to follow the printed manual that came with it. This is confusing to a beginner. Some show using all the trays at once, whit them piled high with hardly broken down food. Shouldn’t it be blended is some why to make it easy for the boys to do their job? Then the shredded paper, everyone seem to do it differently. Can anyone give a basic way to use this bin. Thanks
I was in Walmart the other day, and they had a trash can setting by their ears of corn, for people to put the shucks in. Has anyone used these or do we worry about pesticides?
Why are my worms trying to escape?
I remember reading in the manual (long since misplaced) that the leachate should NOT be used for vegetable crops as it is NOT the same thing as tea. Is this correct?
Hi Jim – I am actually surprised that the manual would say that. I am assuming you are referring to the Worm Factory users manual?
One of the things that has always ticked me off about these stacking bin companies is that they’ve promoted this idea of quality “worm tea” coming out the bottom – seeming to suggest this stuff is every bit as good was real vermicompost tea (made with finished vermicompost).
That being said, it is definitely an “it depends” situation, to be honest. Generally speaking, the newer the system, the closer the liquid will be to basic leachate – which can be risky to use (but not necessarily). When the system is very mature, liquid will be passing down through more reasonably stabilized material, so what comes out from the spigot will likely be better quality.
Risks aside – I’ve always suggested avoiding keeping a stacking system so wet that it accumulates a lot of liquid in the reservoir anyway. You’ll just impede air flow, slow down the process and end up with lower quality vermicompost.
Hope this helps!
My worms seem to crawl out the base??? and I’m finding them on the floor? Are they looking for food?? There is food in the tray?
Hi Christine
That sort of behavior has me wondering if you’ve ended up with some Blue Worms (much greater tendency to roam than Red Worms). If not, I would guess that the environment in your first tray is not worm-friendly.