

As some of you may recall, about a year ago I started up my “Four Worm Reproduction Experiment“. Although I didn’t spend enough time tending to the system (surprise, surprise – haha), the results were quite interesting. Over the course of 5 months or so, the worm population underwent a 25+ fold expansion (I counted 106 worms, but certainly would have missed some). Pretty impressive – although the vast majority of worms were still very young.
Anyway, I haven’t written all that much about the wooden stacking bin I used for the experiment, so I thought it might not be a bad idea to update everyone about that system. Once the experiment was officially over, I continued to add food and water to the bin in an effort to use it the way it was intended (ie. by actually adding additional trays etc). Initially, I was a little frustrated with the system’s tendency to dry out really quickly, as well as the trouble I had trying to keep it free of fungus gnats and/or fruit flies. Thankfully, adding the parasitic nematodes did seem to help.
Once I had secured a large supply of the aged horse manure (with bedding) – which has been all the talk of the blog for the last few months it seems (haha) – I found myself enjoying the stacking system much more. The aged manure was an excellent bedding/food and it also contained lots of baby worms and cocoons. I noticed activity in the bin increasing by leaps and bounds. I found the material to be great for burying food waste as well, and no longer had serious issues with gnats or fruit flies. In no time at all I was up to the final (5th) tray and ready to evaluate the end result.
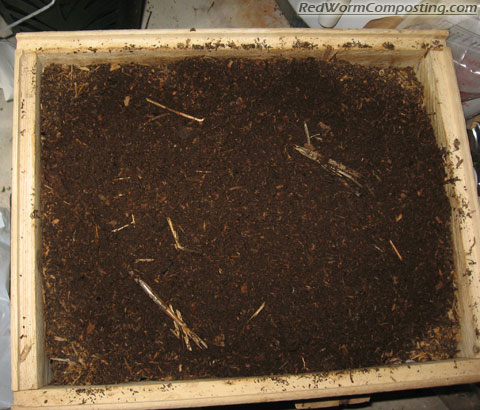
The material left behind in the lower trays looked quite good (with a fair amount of resistant debris understandably still intact). Interestingly enough, the best material wasn’t in the lowermost tray, which had totally dried out and still had lots of organic matter not yet decomposed. The second and third trays on the other hand both had a nice dark, uniform looking material – undoubtedly, at least partially due to the fact that my bedding (aged manure) was already pretty uniform stuff.
As expected, most of the worms were up in the top two trays where there was more moisture and better food resources. I harvested most of the larger bodied worms (ie not the infants – haha) and ended up with about 3/4 lb of fairly small Red Wigglers. At one time or another there had actually been some Blue Worms (Perionyx excavatus – more on them in an upcoming post) in the system, but I wasn’t able to find any.
All in all, I’d say that the system worked quite well. On the positive side, it was very easy to use and provided excellent aeration, thus aiding the production of high quality vermicompost. Again, the main negatives included the need to keep it moist and the tendency of the trays to easily become infested with pest flies.
The system now sits empty. I’m sure I’ll come with some sort of fun way to put it to use in the near future though (suggestions welcome). And as per usual, I’ll keep all of you posted!
😎
Keep up the good work. I really enjot reading your articles. I have one question. Can you put red worms and Euro nightcrawlers together? If you can will they interbreed? Im leaning towards Euro Nightcrawlers as my main worm.
MERRY CHRISTMAS
FEED YOUR WORMS AND STARVE THE LANDFILL
Euros and Reds are totally fine together, but over time the Reds may outcompete the Euros.
Although they are very closely related, these species cannot interbreed.
Hi,
I have a number of questions that I haven’t exactly been able to find the answer to in prior posts. My apologies if you’ve answered them many times before.
I’d like to build a stacking worm bin (indoors – my garage) out of the rubbermaid bins. I’m looking for the shorter ones as opposed to the 18 gallon ones I see everywhere as I don’t think that height is necessary.
My questions are:
1. Can I make a stacking worm bin using these tubs/bins?
2. Do I drill holes through the lids/bottoms of the connecting bins to allow the worms to migrate to the food source when one another bin is ready for harvest?
3. I’m assuming the air holes should be a small enough diameter to not allow the worms to escape or does it matter?
4. I’m also assuming I can install a drain valve in the bottom of the bottom tub to drain the liquids.
5. Should the lid of the bottom tub have holes with screening material?
Again, sorry to pummel you with questions. I just feel like making my own bins is far more economical than purchasing the commercial variety and your site has me really excited about being able to continue my composting efforts over the winter. My outdoor composter has shut down.
Thanks in advance for your time and thanks for such a great site.
Greg
Hi Bentley,
Thank you for this posting. Great job!
It looks like my estimation on the quantity of worms in the bin is ‘slightly’ exaggerated and the function of dependency of the quantity of worms on number of trays is non – linear.
The conclusion is that those bins are not for growing worms, but for processing the kitchen scrap and the information on my site should be updated.
I have to work on another type of bin – for growing worms.
Greg – I have seen a youtube video showing how to make a stacking flow-through system using Rubbermaid tubs (and it’s not my video – I simply show how to make a tub that sits over a reservoir bin). Drilling 1/4″ (or slightly bigger) holes then making sure to smooth all surfaces (don’t want to cut your worms up with jagged edges) will be the key.
Holes should be big enough to encourage free movement between bins, but not so big that a lot of materials are falling through – obviously no holes in the lowermost bin. A spigot should be quite easy to install. Not sure what you mean about the lid of the bottom bin – I would think it would be just like all the others.
Hope this helps
Edward – thanks for chiming in!
I think you’ve hit the nail on the head there. Great bin for producing compost, but doesn’t hold enough material (and moisture) to be an ideal breeding bin (although worms will certainly breed in it).
If you made a system with nice deep trays and a more robust screening to handle the added weight that would be fantastic!
I can suggest an idea:
You could remove the net from two trays and add several staples to other two thus making a bin of two deeper trays. The net itself should be strong enough to hold a double weight. If you’ll need your net back – just drop me an email.
Hmmm…interesting suggestion Edward. I may just have to test that out!
8)
I have two more questions:
1. Where to get the nematodes?
2. How do you manage to keep the last tray dry? In all my bins the last tray is always the most wet one and I have to dry the compost before using it.
i’m just start having my worms
this artikel is helping me because i’m still finding a good method for havesting
thanks a lots
Hi Edward – sorry for the delay. Some comments kinda fell by the wayside during the holiday rush. You can get the nematodes (and other biological control organisms) from Natural Insect Control (http://www.naturalinsectcontrol.com).
I think the last tray was so dry simply due to the fact that the bin was somewhat neglected. I didn’t really add a lot of water-rich foods, and I also added a lot of absorbent manure compost in the upper trays, thus likely reducing downward movement of water.
———-
Hi Leongpow – Glad to help!
8)