
September 2011
Where do worms go to die?
James definitely caught my attention with his email subject (haha) – I thought it might also be a good topic (actually a couple of topics) to explore here.
Here is his msg:
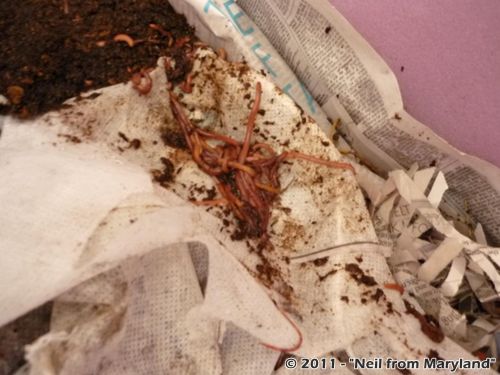
I found one of my Canadian Night Crawlers on top of the bedding and
dead. Does that tell me something?
Hi James,
The one thing that stood out like a sore thumb in your message was “Canadian Night Crawlers” (CNCs) – so we’ll start there. Unfortunately, CNCs are NOT well suited for vermiculture. They are what’s known as “anecic” earthworms – deep burrowing soil dwellers. They need a lot of space (don’t thrive in crowded conditions) and cooler temps than composting worms (which are typically “epigeic” worms). While you can often keep them alive for extended periods of time in some sort of bin or bed, your chances of actually getting them to breed etc are pretty slim. Your best bet for raising more of these worms would probably be to set up some sort of large, undisturbed outdoor soil plot, then lay down layers of grass clippings, leaves etc (keep the area nice and moist as well).
If you are looking for a larger composting species – and one with quite a bit of versatility – the “European Nightcrawler” is definitely the way to go. You will have far greater success raising these worms in smaller systems (assuming you set them up properly) than you will with CNCs, that’s for sure.
Now, getting back to the question of where “worms go to die”!
😆
As you have noticed already, it’s not uncommon to find dead worms up near the surface of a system – although, in all honesty, I probably wouldn’t be TOO worried if it was only one worm. When you do find dead worms it’s probably not a bad idea to dig around a bit to see if A) there are more dead worms down below, and B) there are any clues as to why worms are dying. You may want to leave the lid off for awhile (with light over top) since this allows toxic gases (like ammonia) to escape, and just generally helps to oxygenate the system (always a good thing).
What’s interesting, though, is that dead worms are often never found – unless a bunch of worms die at the same time. This is because they decompose VERY quickly – especially when temperatures are warm. Remember – they are basically just nutrient-rich bags of water, so there are plenty of other critters (in a typical worm bin) ready and willing to get rid of the evidence!
{insert evil laugh}
Anyway – sorry to be the bearer of bad news regarding your desire to raise CNCs, but hopefully this post has helped to clarify things a bit!
Best of luck!
Vermicomposting in Florida
A question from Bernie:
I am interested in vermicomposting, however I live in SW Florida. Is there anything I need to know?
If there is anything special about doing this in Florida, where would I find this information.
Hi Bernie,
This is a good question (and actually a topic I was recently discussing with another reader)! Florida certainly presents some challenges for those wanting to get into worm composting – assuming one is planning to set up a system outside. The climate tends to be VERY hot and VERY humid for a good chunk of the year. The problem with this combination is that it can make it really challenging to keep your system cool enough for the worms. In locations with more of a “dry heat” (Arizona etc), you can take advantage of the benefits of evaporative cooling – but this won’t likely be nearly as effective a strategy for Florida vermicomposters (although I’m sure it can vary from one part of the state to the next).
Aside from the climate, you may also encounter issues with various predators, the scariest among them being the predatory flatworm. I’ve read that these creatures can wipe out an entire worm population in very short order, and there’s next to nothing you can do about it. Keeping your system up off the ground should definitely help to reduce the chance of invasion though.
Two other warm-climate, pain-in-the-butt organisms you’ll likely need to deal with are fire ants and black soldier flies (or more specifically, black soldier fly larvae). Neither of them will likely prevent you from vermicomposting, and perhaps if your goal primarily revolves around processing waste materials, you’ll even come to appreciate the BSFLs – but they can sometimes represent the “straw that broke the camel’s back” for those just trying to have fun with their worm composting efforts.
All that being said, I should mention that there are still plenty of people who are successfully vermicomposting in Florida! RWC friend and contributor, Larry “Garbage Guru” Duke, is a prime example (check out his funny solution for getting rid of fire ants >>HERE<<). Another "Larry" who has done well in Florida is worm industry veteran, Larry Martin (of VermiTechnology Unlimited). One thing that may increase your chances of success is the use one of the tropical composting worms - either the Blue Worm (Perionyx excavatus) or the African Nightcrawler (Eudrilus eugeniae) rather than Red Worms, since they can typically tolerate higher temperatures, and are also faster waste-processors at higher temps.
Anyway – I hope this helps a bit!
8)
Releasing Worms Into the Wild
A question from Kristin:
Too many gnats…what’s the nicest way to set my worms free so they’ll
survive in the wild?
Hi Kristin,
Generally speaking, I don’t really recommend releasing composting worms into “the wild”. As I wrote about back in the spring, there has been quite a lot of concern expressed regarding the potential threat of “invasive earthworms” in various parts of North America (see “Do Composting Worms Pose a Threat as Invasive Species?“). While Red Worms (Eisenia fetida/andrei) are not thought to pose any real threat, it’s still probably better to avoid purposely releasing them into a natural habitat.
Using composting worms in your yard/garden is a bit more of a gray area. Some frown on the idea, but I personally still recommend doing so (and do so myself) – so unless you happen to live right on the edge of a sensitive northern forest, perhaps this might be a way for you to still use the worms and not have to worry so much about gnats.
Here is a post I wrote about setting up a backyard composter for vermicomposting:
“Earth Machine Vermicomposting”
You may also want to check out the “Vermicomposting Trenches” section on the “HOT TOPICS” page.
Assuming you are not interested in continuing on with ANY form of vermicomposting (or perhaps you don’t have a backyard etc), I recommend putting an ad up on Craigslist or one (or more) of the other popular online classified ad websites advertising your “free composting worms”. I’m sure that even with gnats, someone in your area would be interested in taking them off your hands. You could also post something here (on the blog) and/or over on the Vermicomposters forum as well to see if you can find someone in your area.
Hope this helps!
8)
Neil’s VB24 Journal – Day 1-8
As promised, here are Neal’s Day 1-8 VB24 journal entries (if you missed the “Day 0” entry last week you can find a link at the bottom of this post). Again, let me remind everyone that Neal’s future updates will be fewer and further between – he simply wanted to let us know how the first week went (always an important time period for a brand new vermicomposting system).
Day 1 – Thursday, September 1st
The five pounds worms that I ordered through RedWormComposting.com arrived right on time and in good condition. Their arrival created a bit of a stir since they were delivered to my office. I wasn’t looking forward to the attention they would create at work, but that was better than having my investment potentially bake in the sun at my doorstep.
Five pounds of worms may have been more than necessary. According to Bentley’s “getting started” page on his blog, the commonly accepted guideline is to have 1lb of worms per square foot of surface area. Based on this guideline, the VB24 should only need 4 lbs of worms (it’s 2’ x 2’). Plus, since red worms reproduce quickly, I could have started with fewer and the population would have quickly grown to this amount. I decided to play it safe and order 5 lbs. I was concerned that some might die during delivery and that others might not survive in the VB24 since this was the first time I’ve experimented with vermicomposting. Plus, the more worms, the faster they produce great vermicompost for next year!
While the worms certainly weren’t looking too lively after traveling for a few days, they were alive and hopefully they will thrive in their new habitat.
Here are a few of the many worms that arrived:
At the end of the day, I attached a small light to the end of an extension cord and hung it over the edge of the bin. Worms can have difficulty adapting to a new environment, and I have read that having a light on in the bin prevents them from scaling the walls. Since worms are sensitive to light, this will hopefully cause them to burrow into their new habitat in lieu of attempting an escape.
Day 2 – Friday, September 2nd
I was a bit nervous when I checked my worm bin this morning. All the worms were clustered in the four corners of the bin and a good number were trying to escape by crawling up the sides. My theory was that the system was creating too much heat.
My sister agreed with this theory. She has extensive experience raising chickens, and whenever heat lamps in chicken nurseries create too much heat, the chicks move to the corners where it is cooler. Except instead of this being a case of baby chickens escaping the heat of a lamp, these were worms clustering in the corners of my VB24 because they were on top of decomposing organic waste that was creating far too much heat.
To remedy this problem, I dug a hole that was 6” in diameter in the center of the worm bin. I filled this hole, which went all the way down to the bottom layer of cardboard, with shredded, moistened cardboard. Since the middle of the bin was the hottest, I thought this step would cool the system down. I also added damp, shredded cardboard on top of the habitat. Thanks to Bentley’s suggestion, I filled a glass bottle with ice-water and placed it in the system to further cool things down. Additionally, I discontinued the use of the light, which was also a contributor of heat.By the evening, a good portion of the worms had moved away from the corners of the bin and towards the middle. I refilled the glass bottle with fresh, cold ice water and placed it again in the system to ensure that the system would not overheat again at night.
Day 3 – Saturday, September 3rd
On Saturday morning, the worms were spread throughout the system. There was no significant clustering in the corners of the bin. The worms had increased in size since arriving on Thursday in a dehydrated state and they looked healthy. When I opened the lid of the VB24, I noticed significant activity and movement. It appears that I solved the issue of overheating by adding more bedding, discontinuing the use of the light, and temporarily adding cold bottles of water to the system. Since only a few worms were on the sides, I’ve decided not to use the nightlight for the time being.
Day 4 – Sunday, September 4th
Overheating still seems to no longer be an issue. I have not added bottles of ice-water to the system since Friday, and there are no signs today that the worms are uncomfortable in their habitat. A few worms were making their way up the sides of the bin, but I imagine that this should be expected with a worm population of this size in the VB24.
Day 5 – Monday, September 5th
The worms are indeed thriving in this habitat. They are well spread out throughout the system. Here is a (blurry) picture of some of them:
This evening I fed the worms for the first time since placing them in the bin. I gave them a mix of food scraps–banana peels, peaches, carrots, coffee grounds, and greens–that had been rotting in a Home Depot 5 gallon bucket for 3-5 days. The 5 gallon bucket was about one-third full. Once again, I mixed some shredded cardboard in with the food scraps while they were rotting.
After evenly spreading out the new food on top, I decided to run my first experiment. I have heard that worms love watermelon, so I placed half of a water melon rind on one side of the worm bin and half on the other. On one side the rind was cut into small pieces, and on the other the rind was cut into two large pieces. It will be interesting to see how the worms react.
Day 6 – Tuesday, September 6th
This morning I noticed that the worms were clustering towards the sides of the bin and that about fifty of them were crawling up the sides. Before I fed them yesterday evening, they were spread throughout the system, so this is quite a change. I am not noticing an excessive amount of heat in the system, so it must be something about the quantity or type of food that I fed them yesterday that caused them to react this way. Since there was not as much clustering as on day 2, I decided not to make any adjustments to the system such as adding bedding. I did spray a little water on them to make sure that there was enough moisture (I do this at least every other day).
I checked the system again in the evening, and the worms had dispersed throughout the bin. Only 7 of them were on the sides. My theory is that the placement of new food into the system created a gas buildup overnight and the system did not vent enough of it out quickly enough (if anyone has another theory, please email me at neil.vermicomposting@gmail.com). I kept the lid open for a little while in the morning, and that may have dispersed the gases created by the not-fully-decomposed new food. This just shows how you have to be careful when adding to much new food to the system.
Day 7 – Wednesday, September 7th
Everything looks good in the system. The worms are spread throughout and they have started to work on the watermelon. It’s nice that the bin is built and the worms have plenty of food. Now that I’m getting the hang of it, I think that this system is going to be pretty low maintenance from here on out. I will be monitoring the system more closely, however, after I feed them. I didn’t really have to pay any attention to the worms at all today. I just checked on them in the morning and evening.
Day 8 – Thursday, September 8th
Today was another low-maintenance day. The worms were extremely active in the bin both in the morning and evening when I checked on them. When I open the lid, they immediately dive into the compost to escape the light.
Here are a couple “pros” of this system based on my first week of operating it: 1) It is low maintenance (after the initial labor-intensive process of getting it built and set up), and 2) the bin doesn’t create any unpleasant smells. I would say that the bin has added a bit of an “earthy” smell to the garage, but it is not unpleasant and it doesn’t smell anything like rotting food. I don’t have any “cons” to report on at the moment. I’m really enjoying my new pets.


Previous VB24 Journal Posts
Neil’s VB24 Journal – Day 0
Particle Size Experiment-09-16-11

Back at the beginning of the month I wrote about my plans to test the question of whether or not food particle size makes a difference in terms of worm growth/reproduction (see “Does Particle Size Make a Difference?“). Later that same week I set up my three bins (pictured above) with shredded (drink tray) cardboard and 350 grams of carrots each. My three treatments, again, are: 1) coarsely chopped, 2) ribbon (peelings), and 3) finely chopped.
All carrots are being frozen prior to use, and I had assumed that this would allow me to further grind up the finely chopped carrots (thus increasing surface area) – but things didn’t work out as planned (ended up rubbery rather than soft and easily squished!), so I had to make do with that size for my initial set up. Moving forward, I will start blending the carrots for the fine-particle treatment just to make sure I’m REALLY getting those particles nice and small.
After adding the carrots to each bin and moistening everything, I simply let them sit until the following week. About 5 days after setting up, I added 50 immature Red Worms to each bin. Again, I didn’t want to add mature worms since they could have already been fertilized – meaning a fair number of cocoons could have been laid in the system without any further mating and any real influence from particle size in general.

I’ve checked on the bins since stocking them and the worms seem to be processing the carrots and cardboard down in the lower zones. I’ve had to add more water (equal amounts to each bin) on a couple of occasions since the systems have been on the dry side.
I will be purchasing some more carrots and getting into a regular feeding schedule – hopefully starting next week.
Stay tuned!
8)
Neil’s VB24 Journal – Day 0
Neil from Maryland (our new RWC VB24 correspondent – lol), has submitted journal entries from his first week or so of VB24 use. Today’s post will solely be dedicated to his “Day 0” entry since it was pretty substantial. It explains how he initially set up the bin in preparation for the arrival of his worms.
I will post his Day 1-8 entries either tomorrow or early next week. Moving forward, Neil will shift to a more periodic type of update (i.e. obviously he won’t be sending in journal entries for every single day! haha) – but he wanted to make sure we were familiar with how things got started for him.
Day 0 – Wednesday, August 31st – “Creating the Habitat”
I completed the construction of my Vermbin24 yesterday, (I put together a photo-journal of the process which is available in the members area for those who have purchased the VB24 plans) and since I’m expecting the worms to arrive tomorrow, tonight is the night to prepare their habitat.
I knew that the worms were going to arrive soon after the completion of the bin (1 day after, actually, if USPS delivers on time.) It is recommended, however, to let the food and bedding sit in the VB24 for one to two weeks before adding the worms. To deal with this issue, I had a mixture of organic waste–consisting mostly of carrots, bananas, and coffee grounds along with other food waste from the kitchen–rotting in buckets outside for 3-10 days prior to the arrival of the worms. I also mixed some shredded cardboard with the food in the buckets to make sure that the C/N ratio didn’t get too low. (For basic info on C/N ratios, try this website: http://www.composting101.com/c-n-ratio.html)
Here is the food mixed with a little bedding (about 2/3 of a 5 gallon bucket):

Let’s take a look at how I created the habitat. First, I covered the false bottom with 2 layers of cardboard.

Then I added newspaper–about five layers thick. Both the newspaper and cardboard wrapped up the sides of the bin.

Next I added the bottom layer of bedding. It consisted of small pieces of cardboard, shredded paper, compost—consisting mostly of leaves—from the backyard (shown on the shovel) and some soil from the garden (not pictured here, but I sprinkled it on top).

Then I added a layer of food.

(pictured above: food on the shovel)

(pictured above: food spread out over bottom layer of bedding)
Next came another layer of bedding: cardboard, shredded paper, compost & soil.

Then another layer of food…

Another layer of bedding…

And lastly some old, rotting hay to top it all off:

In retrospect, I shouldn’t have added the soil, and I should have used newspaper in lieu of white paper. If I had fully read Bentley’s (“Incomplete“) Guide to Vermicomposting before creating the habitat, I would have learned that adding soil can introduce new critters to the system. I’ve noticed a few bugs in my VB24, and I believe they caught a ride in with the soil. As Bentley also discusses in his Guide, newspaper should be used in lieu of white paper.
I did, however, add PLENTY of bedding to ensure that I did not make the beginner mistake of not providing enough of it.
(Note: This is just how I created the habitat in my VB24. As I continue to post new entries of “Neil’s VB24 Journal,” I will give updates about how my worms are doing, but this journal entry is in no way an “official” guide to building the habitat in a VB24)
VermBin24 Q&A

Late last week I quietly launched the plans for the VermBin24 DIY flow-through bin. I didn’t make an an announcement on the blog, or send anything out to the main RWC email list, though, since there were a couple of things I still wanted to take care of.
For starters, I wanted to format the “photo-journal” Neil (“from Maryland”) put together for fellow plan-owners and get it uploaded to the member’s area (that’s now taken care of).
I also wanted to put together a Q&A blog post so as to answer some of the common questions people may have (some of them are based on actual questions that have come in – others simply cover topics I think some people will be curious about). As the title implies, this is that post!
8)
What format are these “plans” delivered in? Will I receive them in the mail?
These plans (with guide) are packaged as a PDF document (requiring Adobe Reader to open – virtually every computer already has this installed though, so no worries). They can be downloaded inside the VermBin member’s area. Nothing will be mailed to you.
What are the advantages of electronic format?
For starters, you can basically access them instantly (once you are successfully registered). Also, we will almost certainly be updating these plans (have done so once already) as new design features get added, more info added to guide etc. Lastly, offering the plans in electronic format also helps to keep the price fairly low since we don’t have to pay for printing/binding etc.
Will I be able to print these plans out?
Absolutely! We’ve added some security features to help reduce copying/sharing of the document, but printing is obviously allowed and we totally understand the desire/need to do so.
Can I share these plans with others?
The plans are intended for single use (as in one set of plans per person) – and each customer’s contact information is stamped into the document – but there’s obviously only so much you can do to prevent people from sharing an electronic file. All we ask is that you keep your sharing within reason (family members etc), and whenever possible please refer people to the site if they have an interest in the plans. Money generated from the sale of the plans (and other products we sell) helps to support the continued development of Red Worm Composting.
How much will it cost for the supplies needed to build this bin?
There is obviously no set-in-stone answer for this since it will depend on a range of different factors, such as where you live and how determined you are to save money. Based on the estimates received from Joe and Neil, I’d say that it’s likely to cost somewhere in the vicinity of $75-$125 USD if you are buying all new materials. I have little doubt that there are plenty of people out there who will be able to construct the bin for less than that though.
Will I need any specialized equipment to build it?
Another one that’s a bit difficult to answer since “specialized” is somewhat subjective. If you are a completely non-DIY person and have no tools whatsoever, you will likely need to buy some (or borrow some) in order to build the bin. That said, my prediction is that most people would have most of the equipment needed to put the VB24 together. The only additional tool-related item Neil had to purchase was a 1″ drill bit if I remember correctly.
What level of skill is required to build a VB24?
As a self-described “DIY Dummy”, my initial gut feeling is that this is a “medium” level project. Anyone with a decent amount of DIY experience would likely consider it pretty easy I suspect. If you are not very comfortable with tools, my recommendation would definitely be to find a friend or family member who can help you (not a bad idea regardless of your level of skill actually). I feel pretty good about my chances of successfully completing this bin – but I am still enlisting the help of my dad since I think it will just generally help the process to go a bit more smoothly.
How big is the VB24?
As the name implies, the main bin itself is basically a 24″x24″x24″ box. It stands 42″ off the ground (without wheels).
The actual internal volume is somewhat less (than 24x24x24) – with the insulation panels it works out to somewhere in the range of 5.6 cu ft or so. I consider the Worm Inn to be a decent sized system, and it is about 2 cu ft – so hopefully that gives some perspective.
How many worms should I stock it with?
I like to do things my own way, and never use any specific guidelines when stocking a new system. When I stock my own VB24 (once built) I can guarantee I’ll just add a whole bunch of wormy material from another system (my preferred method for starting up a new bin/bed). Neil stocked his VB24 with 5 lb of Red Worms, and they seem to be doing well. I definitely wouldn’t start with any more than that, and really, you’d probably do just fine with 1-3 lb. Red Worms reproduce pretty quickly, so as long as you don’t mind being a little more patient, even a fairly modest starting population should work just fine.
How many lb of waste per day can I process with a VB24?
This is a question I have always tried to steer clear of, regardless of the system being used. There are countless variables that can affect the processing speed of a vermicomposting system. Here are some common ones: 1) temperature, 2) size of worm population, 3) maturity of the system, 4) type of waste being added, 5) waste handling practices (pre-composting? grinding? etc etc), 6) experience level of person taking care of system, 7) moisture content. This is definitely something I plan to test once I’ve got my own VB24 up and running, but even then I’ll be left with a set of results that apply to my own situation (certainly not set-in-stone numbers that everyone can expect to see with their own system).
Should I use this bin outside or inside?
The VB24 will likely work just fine outside – perhaps even more effectively than a lot of other home “worm bins” – but for the best results, my recommendation is to keep it in a location with a controlled environment. This is especially true if you live in a region that experiences heat and/or cold extremes.
Apart from the external environment affecting the vermicomposting process, it can also affect the bin itself. Obviously, a VB24 sitting outside exposed to the elements won’t last quite as long as one sitting indoors.
Can this bin be used when the weather is cold?
The design DOES feature (optional) insulation panels, and as mentioned above it also holds a decent volume of material. That being said, it’s important that people don’t assume this means it’s a “winter bin”. I’m sure with some sort of small external heat source it would be a lot easier to keep this bin from freezing out in a uninsulated garage (for example) during winter than if using a regular plastic tub system – but please do keep in mind that it’s still not a massive bin, so there’s probably only so much you can expect as far as self-heating (and heat retention) goes.
What makes a VB24 system better than a Rubbermaid tub system?
Where do I start? (lol)
There is a MUCH better air-flow/moisture balance, so the composting zone will stay much more oxygenated – this is vitally important for any sort of aerobic composting process (as the name implies). This results is faster waste processing and better quality end product. Obviously, the fact that it’s a flow-through bin also means that harvesting castings/vermicompost will be a lot easier (more on that in a minute).
Will a VB24 system dry out really easily?
With increased air flow there can often be increased risk of drying out, but the VB24 actually retains moisture quite well – especially if you choose to install the insulation panels. You may need to add water from time to time (especially if it’s outside during hot/dry weather), but it won’t likely be as problematic as some other wooden bins.
How do I harvest castings from this bin? Is there some sort of harvesting mechanism incorporated into the design?
This is pretty straight-forward. Simply use some sort of fork, rake or brush to scrape material down through the floor bars. At this time there is no scraping bar or anything like that included in the design – but this may be something we’ll consider adding as an optional feature in a future update.
When can I start harvesting castings from the bin?
This will of course vary from system to system (again, remember all those variables we talked about earlier). Generally speaking, you should probably be prepared to wait at least 3 months or so before your first harvest. We strongly recommend the installation of some sort of “false bottom” using cardboard/newsprint etc, and the basic idea is that once this has broken down completely (assuming it was reasonably thick) you should be well on your way to being able to harvest finished material from the bottom. You should also be aiming to build up the levels of material in the bin so that most of the worms will mainly be concentrated up closer to the top of the system.
What about the larger VB bins – will you be releasing plans for those as well?
Yes we will. We are hoping to release a “VB Series” plans bundle sometime in October. It will include the VB24, VB48 and VB96. All those who purchase the VB24 plans before then will be able to upgrade to the full bundle for only $5 once released (but this is of course completely optional).
Will you be selling actual VB24 bins (kits to build etc) at any point?
This is an idea that Joe and I have toyed with a bit. We’ll likely look into the possibility at some point, but it’s probably safe to say that actual VB24 bins won’t be available for purchase before 2012, if at all.
Can I build and sell VB24 bins?
If this is something you’d be interested in doing, please drop me an email. We’re pretty open to different ideas, and there may be the potential for setting up various types of arrangements. Please DO NOT simply start doing this on your own – especially if you intend to use the VermBin24 name.
Can I promote the plans and make money?
I will likely be setting up an affiliate program for VB24 plans at some point if there seems to be enough interest. Basically this would be intended for those who have their own website(s), and would involve simply referring people to the VB24 sales page via a banner or basic link (these would contain a special affiliate link so any sales that resulted from the referral would be tracked).
**Get the VermBin24 Plans >>HERE<<**