
January 2012
Winter Vermicomposting-1-30-12

I finally managed to get out for a daytime check-up on my winter vermicomposting bed late last week (all my coffee grounds pick-ups are made during the evening, so I don’t really have a good opportunity to SEE what’s going on when I deposit new material). In all honesty, this winter has been pretty disappointing as far as really getting the chance to test out this system goes. Temperatures have been much warmer than normal, and we’ve gone through countless thaw/freeze cycles during the last couple of months.
Obviously it’s better than having my system freeze solid on me (lol), but I was really hoping to see how well this new bed would perform in really cold weather. Call me a pessimist, but somehow I just don’t see things changing all that much over the course of the next month or so – but ya never know! (As an interesting side note – this weekend ended up being really wintry, and we now have a fair amount of snow! lol)
Unfortunately, I forgot to take my thermometer out with me – so no “official” temperature readings – but it was pretty clear to me that the bed is still quite warm. When I pulled back the tarp, the underside was wet (not frosty), and there were loads of springtails crawling around on it.

Digging around with my garden fork released plenty of steam from below – so I’d say that was a pretty good indicator as well. I was really hoping to find some solid pockets of worms this time around – but it seems as though the upper zones of the bed are not particularly worm-friendly at the moment.
As I’ve written before, one of the challenges of using coffee grounds – aside from the heat it can generate (which can actually be “good” or “bad” depending on the time of year) – is the tendency of this material to totally dry out on you. Hot, dry conditions are not exactly ideal for the worms!
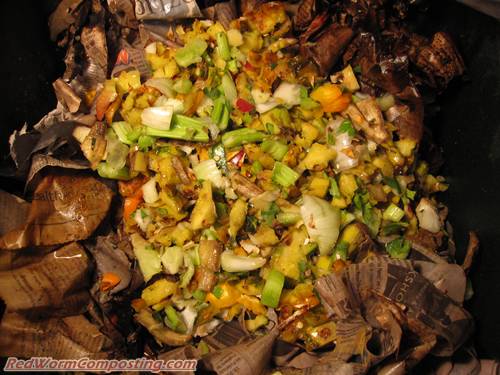
My hope was that all the food waste added would help to keep the grounds moist, but I’m finding plenty of zones that have that almost “burned” look about them (something I’ve written about in some of my older coffee grounds vermicomposting posts), as shown in the images below. This is most likely the result of fungal growth (some variety of thermophilic fungi, no doubt) – not actual combustion, of course – but regardless, these zones are still way too hot and dry for the worms to live in.


I did find higher concentrations of worms around the outer edges of the main composting zone – so that’s promising. I really just need to put more effort into keeping the grounds nice and moist.
Anyway – that’s all for now. I’ll aim to provide another update in a week or two.
8)
NCSU’S 13th Vermiculture Conference
I received this from Rhonda Sherman today:
NCSU’S 13TH VERMICULTURE CONFERENCE will be held on November 5 & 6, 2012 in Chapel Hill, NC at UNC’s Friday Center (the location of last October’s conference).
Save the date on your calendar if you are interested in participating in this year’s event. Details are still being developed and will be added later to the conference website at http://www.bae.ncsu.edu/workshops/worm-conference
I look forward to seeing you in November!
Rhonda Sherman, Conference Chair
Biological & Agricultural Engineering
North Carolina State University
http://www.bae.ncsu.edu/people/professionals/sherman
Euros Vs Reds – Take Two…and…ACTION!
A couple of weeks ago, I excitedly reported that I had finally started up a brand new RWC experiment (see: “The Euros vs Reds Head to Head Challenge“)! Well, my excitement was certainly short-lived – within a couple of days, all my Euros except for one had perished (still not sure what happened there)! As I discovered yesterday, at least three of the Red Worms managed to survive.
I’ve decided to see if I can actually get this experiment off the ground (lol). Unfortunately, I don’t have heaps and heaps of Euros available, so I’ve had to make do with what I could find (in my other bin) – which happened to be six somewhat smaller worms (last time I selected individuals that were clearly adults – this time at least some of them definitely aren’t) and two cocoons.
You may be shocked to learn that I am using the exact same bins (with same material in them) – but the fact is, we’re not dealing here with some sort of persistent chemical toxin. Whatever it was that killed those Euros (my guess is a quick release of ammonia), it’s almost certainly not still going to be an issue in the bin two weeks later – especially given the fact that the surviving worm was in there the whole time, likely doing his part to make it more worm-friendly.
Similarly, I am also leaving the Red Worm bin as-is. I’ve only been able to find three worms in there, but there could very easily be some others hiding out in the bedding material (remember, they are very small) – I will definitely be able to come up with an accurate tally once they get a bit bigger, and I start adding more food.
So, it looks like the deck is still stacked in the Euros’ favor – but we shall see!
I’ll aim to provide another update next week.
8)
Good Worm Bin Progress?
Question from Matt:
My bin sat for 2 weeks prior to adding worms and was smelling pretty
bad, as expected. Two and a half weeks after adding the worms the
smell went away which is a good sign. The contents of the bin have
settled at least 6 inches so I added some shredded newspaper on the
top and moistened. I check it once per week and am finding 10-15 worms
crawling on the side of the bin above the bedding. Is this normal?
Should I add additional scraps to the bin? Do the worms eat the
bedding?
Hi Matt,
Let me start by saying that an aging bin actually shouldn’t smell bad. The idea is to mix in enough bulky, absorbent bedding (such as shredded cardboard), and provide enough air flow so this doesn’t become an issue. A smelly bin is typically indicative of anaerobic conditions – which can develop when: 1) too much food is added, or 2) not enough bedding is added, or 3) conditions become too wet, or 4) there isn’t enough air flow. Most often it is some combination of these (for example – moisture and aeration tend to be inversely proportional to one another – so if conditions are “too wet” you are basically guaranteed to also have “poor air flow”).
Anyway – I’m really glad your worms were able to remedy the situation. They tend to mix things up and aerate the materials, thus helping to eliminate some of those major anaerobic zones.
8)
It sounds like everything is proceeding nicely (a drop in the level of materials is a good sign for sure)! I wouldn’t worry TOO much about having a handful of worms on the sides – this is VERY normal in an enclosed plastic bin. You might want to add more air holes in the sides and lids (can’t really have “too many”) just to make sure there is decent air flow – I also highly recommend keeping a nice thick layer of bedding up top at all times. When you add this material dry, it serves to absorb moisture in this upper zone making it less appealing to the worms. It has the added bonus of guaranteeing that you will always have plenty of bedding to mix with your food wastes – I really like this K.I.S.S. approach since it means I don’t need to remember to add any bedding with my food. All I need to do is make sure I keep that layer at the top nice a thick all the time.
As for feeding, if the worms have processed most of the food you added when setting up the bin, by all means add some more. The key is simply to use their progress as your guide. If materials seem to be piling up a bit, definitely slow down your feeding until the worms catch up. To help them along, be sure to optimize the materials as well (age, freeze, chop etc). To answer your question – yes, worms do indeed consume bedding materials so don’t worry too much about starving them! (much easier to over-feed)
Hope this helps!
8)
Worm Inn Journal-1-24-12
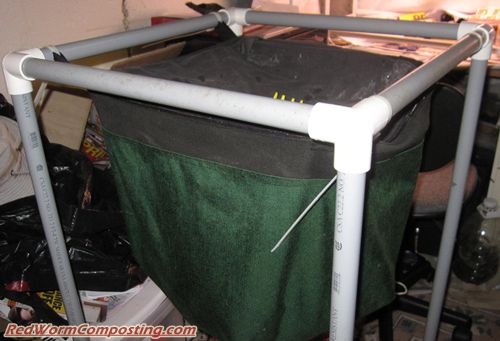
I can’t believe it’s been nearly 20 days since my last Worm Inn Journal update! Yikes.
With my WF-360 check-up yesterday, I figured it was only fair to see how my poor, neglected Worm Inn worms were doing today.
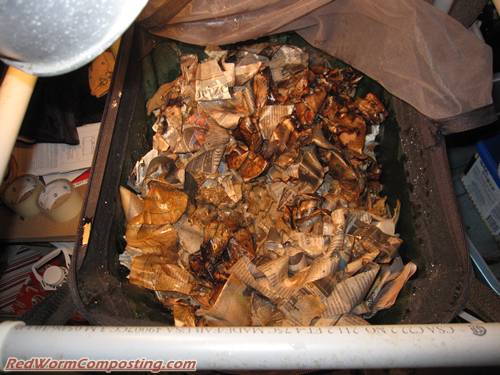
My last feeding (~ 3.3 lb of shredded carrots) was back on Jan 5th and, other than the occasional addition of water, the system has basically been left alone since that time…and it shows. The level of material in the Inn has gone down quite a bit, and while there was certainly some evidence of there having been shredded carrots in there at one point, there really wasn’t much.
I was happy to find LOTS of worms down below in spite of the less-than-optimal conditions. Aside from processing the food that’s been added, they’ve clearly been munching away on the shredded cardboard bedding as well.
Before feeding today, I decided to water everything down a bit since it was looking pretty dry.
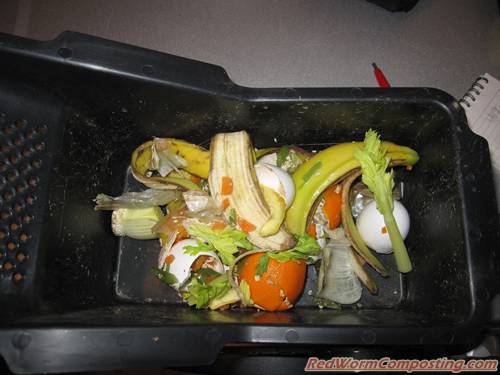
Given how low the level of material was, I decided to use the old cover layer as my base layer below my new food materials. The amount of food I added today was 1.039 kg (2.29 lb). As was the case yesterday, I didn’t have access to any (thawed out) frozen food scraps so I decided to make do with a fairly fresh collection of scraps I’ve been collecting for the past day or so. Again, I made sure to compensate for this by cutting everything up as best I could with a pair of heavy duty scissors (as you can see below, that cluster of leaves at the top of a pineapple is really tough!!).
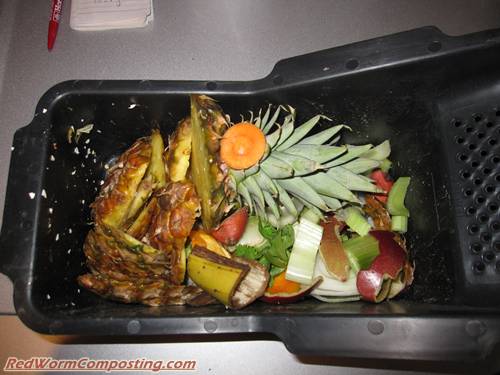

Once I was satisfied with how finely chopped everything was (minus the pineapple leaves! lol) I simply spread the materials over top of my base bedding layer, before adding a brand new layer of dry bedding over top.

—
My aim this time around had been to treat this Worm Inn as a “normal” system – rather than attempting to overfeed as I did with my “Overfeeding Challenge“. Well, it seems I’ve ended up down in the opposite direction so far!
Time to start adding waste materials on a much more regular basis, that’s for sure. With my flying pest problems now behind me (he wrote as he knocked on wood – lol), this shouldn’t create ANY problems!
Stay tuned!
8)
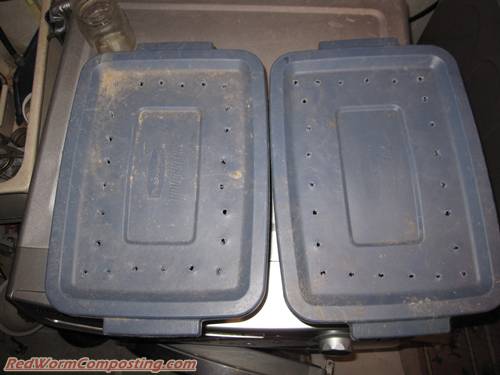
Worm Factory 360 | 1-23-12
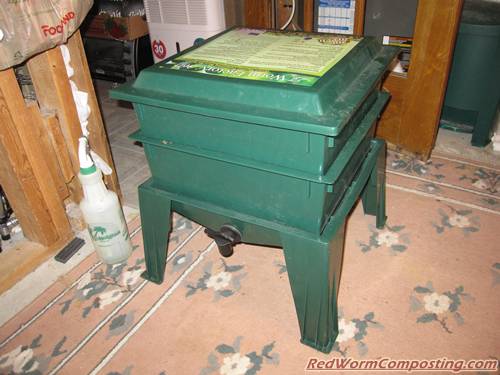
So I finally added my second tray! Woohoo!
Someone left a comment on the site a short time ago mentioning that they had transferred some of the material from the first tray into second tray before adding it on top.
{LIGHTBULB}
😆
So I decided to do the same thing – and it worked like a charm! (surprise, surprise. lol)
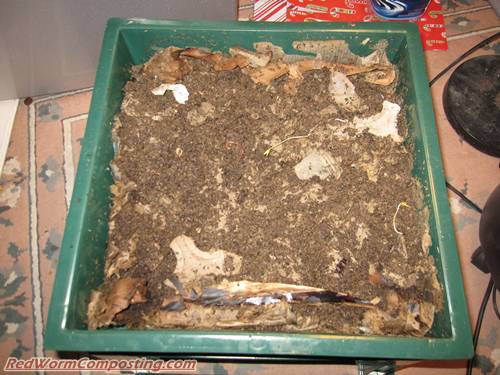
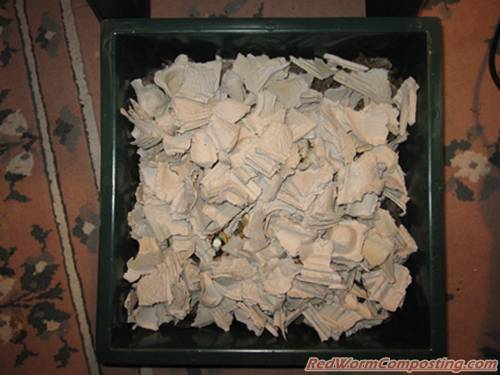
I was happy to see that there was no sign of food waste anywhere in the first tray, and a lot of the bedding materials have been processed nicely! Certainly a fair amount (of bedding) remaining, but I’m sure it will well processed by the time I fill my last tray (still two more to go after the one I just added).
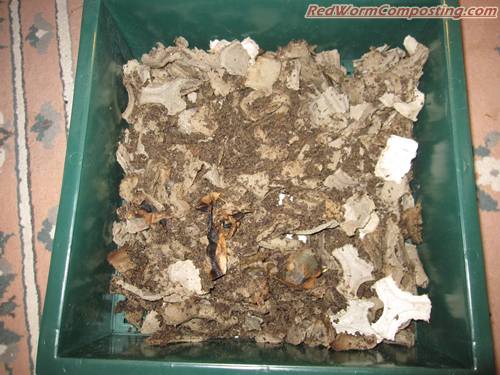
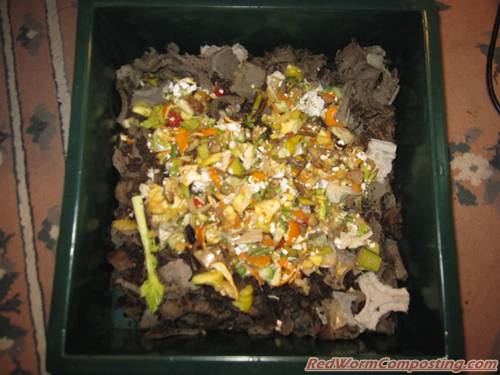
The next two images show what the first tray and the second tray looked like after I transferred the material, respectively.
After adding the older material to the second tray, I decided to add some food waste as well. The total quantity was 420 grams (~ 0.93 lb) – so not a huge amount, but it should be enough to start luring more worms up from below. I was in a bit of a hurry so I ended up using some fairly fresh materials that hadn’t been previously frozen. I made sure to cut everything up really well in an effort to compensate for this (although, this is a great idea even if you DO age/freeze the wastes).

There was no special attention given when adding the food waste. I simply layered it over top of the older material, then added a fair amount of brand new stredded cardboard (of the drink tray variety) over top.
As an afterthought I decided to add some water as well – everything seemed a little dry to me (which is actually pretty cool considering the fact that this is a plastic bin – tells me there is plenty of air exchange).
Will aim to provide another update early next week!
8)
Joe’s VB96 Update

As promised in my latest newsletter (sent out yesterday), I wanted to share an exciting update from Joe Denial (designer of the VermBin series of DIY flow-through bins). He emailed me a little while back to let me know that he had started harvesting vermicompost from his system.
Let me start by pointing out that it’s certainly not mandatory that you wait as long as Joe did (the better part of a year) before harvesting from your VermBin – but as you’ll see below, Joe certainly ended up with some gorgeous compost.
Anyway – here is what he had to say:
3″ from the top.
Finally cut open the bottom of the bin and harvested 1.5″ of finished material. Only 5 worms.Been at this bin, coming up to a year, diligently.
Couldn’t be happier with the results. After taking what I did, the upper 20″ settled to the top of the rods as hoped.
Perfect system, but you need to be patient about priming the pump.
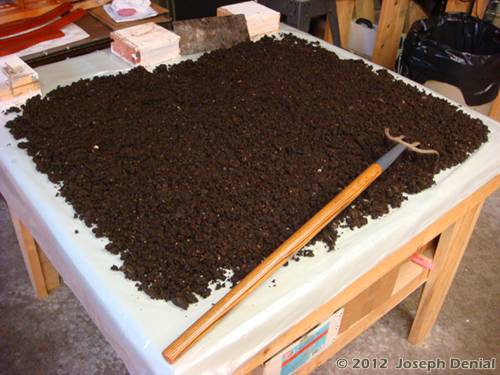
I had to cut open the bottom because it never completely rotted (layered it heavily). Did this because of the escaping worms that I had at the beginning. Used a utility knife to cut between the bars and it easily came out. The rake I salvaged from a hand cultivator. Cut the handle down and cut the tines to 2.5″. Fits perfect and takes only what I want. I have 2 night lights on the shelf for insurance.
Have to say, that I was unsure of the harvesting process. Not how, but the idea that the material would just fall out.
The castings are so compacted and moist, that it doesn’t happen.
So glad to have this setup. Takes minimal effort and produces just like we thought.
This is really exciting news – and I certainly appreciate Joe allowing me to post it here!
8)