
January 2012
January WF-360 Winner

On Monday the folks at Nature’s Footprint selected a winner for this month’s Worm Factory 360 contest.
Congratulations to Marty S. of Livermore California!!
I was VERY happy to learn from Kate (my trusty Nature’s Footprint contact) that we ended up with 299 entrants this month – certainly an improvement over the 70 some odd entries that were in by the beginning of last week!
8)
The next WF-360 contest will be starting in a couple of weeks (I will certainly post a reminder) – in the meantime, Nature’s Footprint is offering a 10% discount on the contest page for anyone interested in purchasing one of these bins.
**For Even More Worm Fun, Sign Up for the RWC E-mail List!**
To Mix or Not to Mix – That is the Question!
A question from Madeleine:
My son and I both have worm bins. I have a worm Inn and he uses a
small rubbermaid container. He frequently mixes the entire contents of
his container then adds shredded newspaper on top. I was under the
impression the red wigglers are happiest at the top layer of a bin, so
I just layer new food and bedding at the top and leave them alone.
Please settle our little debate: to mix or not to mix? PS we both have
growing worm populations. Thanks!
Hi Madeleine,
All in all, I would say that your son’s approach is a good one – especially given the fact that his worm population (according to your last sentence) seems to be doing just fine. Of course, there is certainly more that can be said about this topic though.
When using an enclosed, plastic tub system (without drainage) it’s almost inevitable that you’ll end up dealing with increasingly soggy conditions, and thus decreasingly aerobic conditions over time. As more vermicompost gets produced (creating smaller particles, and a more homogenized mix) bin materials tend to get compacted as well, so that certainly doesn’t help. As such, doing whatever you can to get more air flowing within the composting zone will likely have good results.
While, I’m not sure I would “frequently mix the entire contents” of a plastic bin, I would use a small garden hand fork to get in there and break things up a bit from time to time – in an effort to help air to get down to the lower zones. I’d also likely mix in some new bedding to help soak up moisture and act as a bulking agent (encouraging a bit more air flow). Keeping a thick layer of fresh bedding on top (as your son seems to be doing) is a great approach as well since it will absorb moisture, and inevitably end up getting mixed into the composting zone over time.
NOW – let’s look at your approach…
Even though you take different approach than your son, what you’ve described is in fact a nice, easy – yet still effective – way to maintain an active Worm Inn. The key thing to remember here is that a Worm Inn is a VERY different worm composting container than a plastic bin. The contents of a Worm Inn system won’t likely need to be mixed up at all since the air flow is excellent. It’s never a bad idea to dig around a bit with your fork to loosen everything up once in awhile (and just generally check on conditions down below), but it’s certainly not mandatory.
Bottom-line, there is definitely no need for a “debate” (haha) here – both of your approaches are great for the particular system you’re each using!
8)
Bedding to Waste Ratio
Here is a question from Steve:
Hello,
I am setting up my first worm bin in an 18 gallon rubbermaid tote. I
have watched your videos and have gained a visual idea but am trying
to get a better understanding of the bedding to waste ratio I should
start with. Thanks.
Hi Steve,
Great question. If you follow my writing for any length of time (or spend time reading through past posts etc) you’ll discover that I tend to avoid ratios, calculations and really, anything “set in stone” LIKE THE PLAGUE! lol
There are just so many variables involved that it becomes very challenging to come up with “rules” apply to every situation (apart from some of the basic, core fundamentals of vermicomposting, that is).
That being said, as you may recall, I DO provide some rough guidelines regarding the bedding to food ratio in at least one or two of my set-up videos (if I remember correctly) so it’s certainly a topic that can be discussed further. Let’s start with some assumptions.
I’m assuming here that:
1) We’re talking about food wastes as the primary “food” material and absorbent, carbon-rich bedding materials – such as shredded cardboard (my favorite), newsprint, paper etc – as the primary “bedding” materials.
2) The food wastes are fairly bulky (perhaps partially chopped up) – not ground up or blended.
2) We’re talking some sort of enclosed, plastic worm bin (you mentioned having a Rubbermaid bin, so I think that’s on target).
Given the above assumptions, it’s safe to say that I will ALWAYS recommend adding a fair amount MORE bedding than food when first setting up. How much more will depend on the length of time I’ll be leaving the system to age before adding the worms and what quantity of worms I’ll be adding. In one or two of my older set up videos (it’s all a little hazy now – haha) I demonstrated a bedding-food layering approach. Basically, I started and ended with thick bedding layers, while alternating food and bedding layers (approximately the same thickness) in between.
Adding this much food waste (let’s say 25-40% of total volume) might not be the best idea IF we are planning to add the worms fairly soon (within the first 1-5 days or so). I would only recommend this in cases where the bin would be allowed to age for at least 1-2 weeks, OR if we were going to venture away from those assumptions I listed above (eg. if using larger, open systems, different food/bedding materials etc).
It’s also important to point out that one of the key topics left out of those older set up videos is the recommended maintenance activities during the aging period. In a lot of cases, I’m sure you could get away with simply letting the bin sit and then adding the worms – but for best results, I recommend periodically mixing everything up, and adding even more bedding materials (and water if needed) before the worms are added. In other words, even in cases where I am letting a bin age for quite some time and I have added a lot of food waste to start, I will very often increase the quantity of bedding materials over the course of the aging period – effectively increasing that bedding to food ratio.
Bottom-line – assuming you are adding at least some food, and everything ends up nicely moistened (without pooling on the bottom) – there is really no such thing as “too much bedding” or, in your terms, “too high a bedding to food ratio”. If you cornered me and forced me to come up with a firmish recommended ratio (haha), I’d probably say 3:1 (bedding:food volume ratio) and above. A range of 3:1 to 5:1 would probably be a good zone to aim for, especially if you are just starting out. It’s definitely better to err on the side of having “too much” bedding than on the side of having too much food!
What’s really interesting is that almost every single “brand new vermicomposter” worm bin I’ve looked at over the years hasn’t had enough bedding in it! This might help to explain why I tend to be a bit over the top about all this bedding stuff (remember the RWC mantra – “bedding is my friend”!! LOL).
Hope this helps, Steve!
8)
Wheatgrass and Worms
Here is a question from Travis:
I am raising Afrincan Nightcrawlers and Red Wigglers. I have added
wheat grass to both bins and now it seems that the worms are moving
very slowly and the mites are becoming more aggressive in the bins.
What are my possible options to save both bins and make the most of
this situation?
Hi Travis,
Green materials like leaves and grass can be quite risky as food materials for enclosed vermicomposting bins (well, at least those made out of plastic). The problem lies in the fact that these materials have a low carbon-to-nitrogen (C:N) ratio, so they tend to off-gas excess nitrogen – in the form of ammonia – as they break down (which can happen quite rapidly). Ammonia gas is highly toxic for worms, even at relatively low concentrations – so you definitely want to avoid any and all conditions that can lead to its creation (high pH can be another potential trigger – so be careful with excess lime etc).
My recommendations for rescuing a worm herd typically include: 1) mixing in LOTS of new, moistened bedding, 2) taking the lid off and leaving it off for at least a few days if possible (keep under a light though), and perhaps (if possible) 3) adding some “living material”, such as well-rotted fall leaf litter, or really well-aged manure/bedding mixes (should smell earthy). It’s also not a bad idea to remove as much of the offending material as possible.
Regarding the mites – they CAN seem to become aggressive at times – I won’t deny that. What most people don’t realize, though, is that this is almost always a behavior that goes hand in hand with a decline in worm health (typically caused by poor habitat conditions). I have yet to see common worm bin mites attacking healthy vigorous worms (it seems some other worm bin creatures are not quite so fortunate: “Parasitic Worm Bin Mites?“).
Unfortunately, maintaining a nice “healthy” environment in enclosed plastic bins can be more challenging than in wooden and/or open systems, especially when you are just starting out, but it’s something you gradually develop a certain “feel” (“worm sense”?) for if you keep at it (that’s not to say there won’t ever be random experimental meltdowns or other unforeseen disasters, though! lol)
Anyway – hope this helps! Thanks for the question.
8)
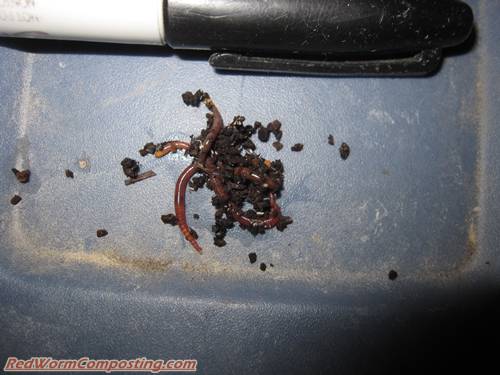
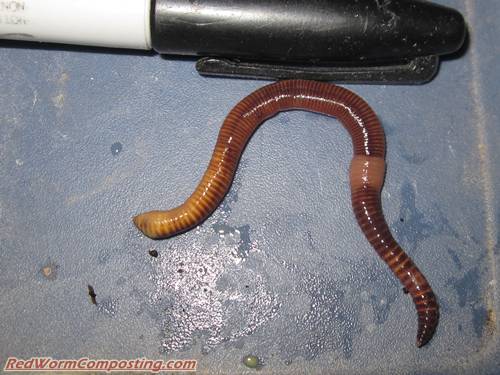
The Euros vs Reds Head to Head Challenge
It’s been awhile since my last fun experiment, so I decided to start something new today. As the title implies, I’m going to be comparing Red Worms and European Nightcrawlers – specifically looking at their reproduction rates and overall composting potential.
As is often the case with my projects, this hasn’t been designed according to rigorous academic standards (by any means) – it’s really just meant as a “let’s see what happens” fun experiment.
As such, I decided to simply set up two small bins – one for Euros, one for Reds. I just happened to have some food waste mixed with shredded cardboard that’s been sitting in a bin for quite a long time (had been planning to use it for a new Euro system). This was mixed with some new bedding (and further moistened) before being split between the two bins.

In some ways this is going to be like my “4 Worm Reproduction Experiment” in that I’ll be starting with a small number of worms and then tracking population growth over the course of multiple months. One difference, of course, is that we’ve now got Euros involved as well. One other change is the fact that I am starting with six worms each (not four).
Why six?
Well, aside from still wanting to keep the starting number fairly low, that just happened to be the number of adult Euros (those with visible clitellum) I was able to round up from another small bin in my basement.
This brings us to the little twist I’ve decided to add. Some of you may recall that I started with juvenile worms for my “4 Worm” challenge – the rationale being that I wanted to ensure that ALL cocoons laid in the system were the result of reproduction that had occurred in the system (adult worms can carry sperm around for some time without the need for further mating – fertilizing and dropping new cocoons all the while).
Since the consensus (academic and otherwise) is that Euros have a longer reproduction cycle, and slower growth rates, I thought it would be interesting to give them a bit of an edge out of the starting gates.
So, I added six adult Euros to one of the bins and six very young Red Worms to the other bin – as you can see below, just one of the Euros was much larger than the combined size of all the Reds!
I’m definitely looking forward to seeing how this one pans out, and feel quite optimistic that I’ll be able to see it through to completion. It’s nice and simple, with little in the way of maintenance required. I’ll basically just be checking in on things periodically, with the occasional addition of food/bedding as well (very occasionally early on I’m sure).
Should be fun!
8)
IMPORTANT UPDATE: Unfortunately, I somehow managed to kill off five of the six Euros, and potentially most of the Reds as well (need to examine that bin more closely). I’m not sure what happened, but I suspect it had something to do with the really old bedding/food mix I used. The long and the short of it is that I do plan to set up the experiment (or something similar) again – just not sure exactly when. Will keep everyone posted.
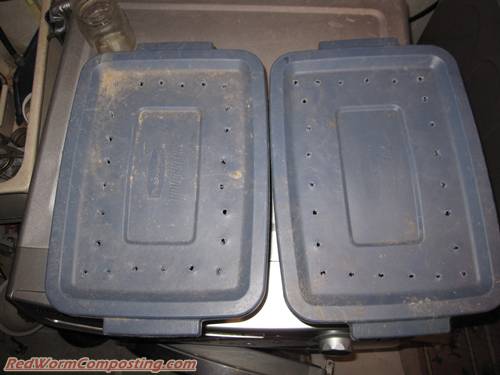
Worm Factory 360 | 1-10-12

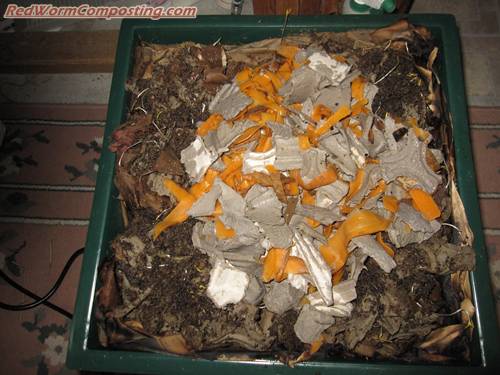
I was actually hoping to have a new generic image for you guys today (i.e one to replace the image above) – showing my bin with a second tray – but alas, it seems I have too much material in the first tray still so I’m unable to get the next tray positioned nicely over top. My plan was to fill the second tray entirely with dry bedding – as recommended by a RWC reader – so as to (hopefully) discourage the development of another bad fruit fly infestation – but obviously, without the second tray nested snugly in the first, that’s not going to do me much good!
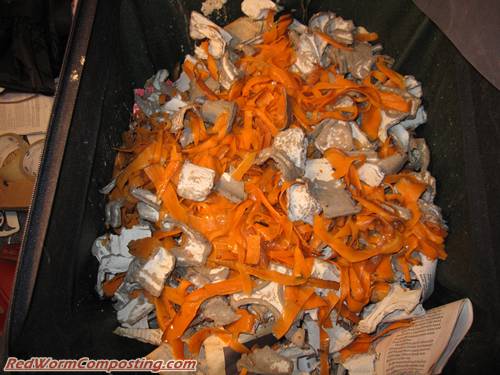
As mentioned in my most recent Worm Inn Journal post, last week I thawed out some frozen carrot peelings and added it to both of these systems – the WF-360 receiving just shy of 1 lb of the material.
I scraped a shallow depression in the middle then dumped in a moistened mix of shredded cardboard and the peelings, before covering back over with the material moved to create the depression, plus some additional dry shredded cardboard.

Although the number of fruit flies in my house has dropped substantially, I’ve been pretty paranoid that I’m going to end up with another bad infestation in the WF system now that I’ve added more food. I checked on things this afternoon, and it looked as though maybe one or two fruit flies (or gnats) flew out, but they certainly don’t seem to have established a strong foothold…yet!
I think it’s safe to say that waste preparation (or lack thereof) can have a HUGE impact on the success of an fruit fly invasion. Any bulkier materials, especially those that won’t be processed by the worms for a while (if at all), seem to be prime time fruit fly breeding grounds. When I checked on the WF bin last week I noticed part of an apple core that still had not broken down all that much (even after a good month or more of sitting in there), so I can only imagine the sort of fruit fly nursery it had been. Other common culprits can be resistant fruit peels and rinds, since the fruit flies absolutely go bananas for them (no pun intended – well ok, maybe a little bit! lol), yet the worms won’t really feed on them all that readily!
Moral of the story – do EVERYTHING you can to optimize materials for microbial break-down and worm feeding. Chopping, freezing, blending, grinding – you name it! If you’ve got a healthy population of worms and you’re presenting them with a material they can start processing right away, there’s a pretty good chance they are going to outcompete (maybe even consume, if they are small enough!) any fruit fly larvae that end up in the material.
I’d love to set up an experiment to test this out a bit but…yeah, I think I’ve had my fill of fruit flies for the next little while! lol
I still have some very small, enclosed (manageable) colonies going though, so perhaps this is something I can try in another month or two.
8)
IMPORTANT UPDATE: The deadline for this month’s Worm Factory 360 contest is rapidly approaching! I was shocked to learn from Kate that there had only been 70 some-odd entries thus far!!! We had more than 400 the first month! C’mon everyone – I know a lot of people are still in holiday mode here (lol), but we need a bare minimum of 100 entries to even have the draw!
Here is a link to the contest page:
http://www.naturesfootprint.com/redwormcomposting
Worm Inn Journal-1-06-12
Quick Worm Inn update for everyone! In my last “Worm Inn Journal” post (see “Worm Inn Journal-12-15-11“) I shared the good news that the parasitic nematodes seemed to have really helped reduce the (massive) number of fungus gnats that were in the system a short time before. Well, as of yesterday, there didn’t really seem to be ANY!
As has been the case with my Worm Factory 360, I’ve basically just left the Worm Inn alone (other than adding some water occasionally). In fact, no food waste has been added since the middle of November, when I added about 7 lb worth. I did some digging around yesterday, and it looks like there are plenty of worms, and – surprise, surprise – a lot of the original bedding material has been converted into worm castings.
Given the apparent elimination of fungus gnats (fingers crossed), I decided it was definitely time to add some more food. Earlier in the week I removed some grated carrots from the freezer and left them to thaw out. I added some of the material to the Worm Factory (will write about that in my next WF 360 update) – but most of it was added to the Worm Inn. It was nice and slimy (thankfully didn’t smell too bad though), so it’s safe to say there was a decent microbe community associated with the material already.
The amount added was just over 1.5 kg (~3.3 lb), so rather than risk having it turn into a big ball of anaerobic goo in the middle of the Inn, I mixed it with quite a bit of dry shredded drink tray cardboard.
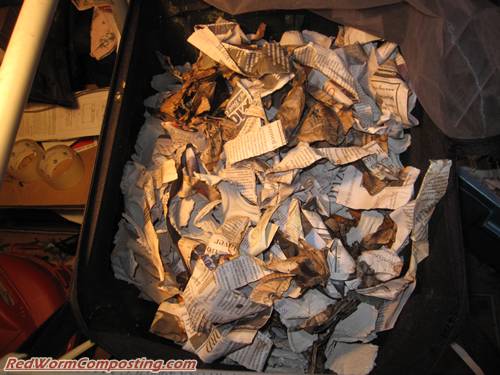
Over top I added a nice thick layer of dry cardboard and old newspaper strips (which had been used in other worm bins), before watering everything down a bit.
If I start to see ANY gnats in the system I will likely start adding the nematodes again – I definitely don’t want to let a full infestation develop before doing anything this time around.
Will keep everyone posted!
8)